Every Korean family has their own kimchi recipe so today I’m sharing my mom’s quick and easy kimchi recipe. I never buy pre-made kimchi from the market because my mom’s cabbage kimchi is the best (and she’d kill me for buying kimchi). While I might be biased, I do know one thing for sure – making kimchi at home tastes so much better than store-bought kimchi!
There are so many different ways to make kimchi but my mom likes to keep it simple with just a few key ingredients. Her recipe is easy, simple, and approachable yet incredibly delicious at the same time. We typically make this in big batches that will last about 1 to 2 months, depending on how fast we go through it.
Now that I’m older, I look forward to making kimchi with my mom because it’s a way for us to bond and spend time with each other. She’s super proud of this recipe, and I’m so thankful to be able to share our family recipe with you!
What is kimchi?
If you ask me, a Korean meal isn’t complete without a side of kimchi. It’s a spicy fermented vegetable side dish that comes in many variations.
It’s said that kimchi was originally prepared as a method for preserving vegetables in the winter. Only radishes and salt were used at the time and they were stored in earthenware pots that were buried underground to keep them from freezing. It wasn’t until trading began that spices, garlic, and napa cabbage found their way into the recipe. Chili peppers were also later added when introduced by the Japanese.
Since then, kimchi has gone through several variations of methods and ingredients. There are now over 100 different types of kimchi!
What cabbage should I use to make kimchi?
When you think of cabbage, the first thing that might pop into your mind is the round, circular green ones that you usually see in the store. Don’t let it confuse you with napa cabbage – the most popular and common vegetable used to make kimchi.
While you can make kimchi with almost any vegetable, we will be using napa cabbage for this recipe. Napa cabbage, also known as Chinses cabbage, is oblong-shaped with ribbed white stems and delicate green leaves.
Why you’ll love this recipe
The great thing about making kimchi at home is that you can adjust the ingredients and ratios according to your taste. Kimchi is all about making it how you like!
The process of making kimchi requires a lot of effort and patience for the fermentation process, but you’ll be surprised by the difference in taste compared to store-bought kimchi. Kimchi making is traditionally a communal effort so gather your friends and family for a fun bonding experience!
How to make Kimchi at home
Making kimchi at home can take a few hours, but once you’re done, you’ll have kimchi ready to eat in your fridge for as long as one to two months. Plus, once you get a taste of homemade kimchi, you’ll never think to buy from the store again. To help you prepare kimchi at home, here’s an easy step-by-step guide to follow:
Step 1: Make the brine
Prepare a big bucket for the brine to ensure all the cabbages will fit. Fill it up with water and add ¼ cup of salt. The brine should be salty to taste, so adjust the amount accordingly depending on the type of salt you’re using.
Step 2: Prepare the cabbage
Start by cutting the napa cabbage in half at the stem. Avoid cutting through the leafy part. Using your hands, rip the cabbage in half. Next, cut the stem in quarters and rip it in half with your hands again.
Slightly wet the cabbage with water to allow the salt to adhere better. Rub a generous amount of salt in between the layers of the cabbage. Transfer to the big bucket with the brining liquid. Set aside for 8-16 hours, making sure to rotate the cabbage from the bottom to the top. Rinse the cabbage with water and drain, making sure to squeeze all the excess water out.
Step 3: Make the sauce
Combine sliced ginger, garlic, chopped onion, and chopped radish in a blender. Then, fill the blender with water about halfway and blend until smooth.
Next, transfer the sauce to a large mixing bowl with chopped scallions. Add the sugar, fish sauce, gochugaru, salt, and anchovy stock (substitute with water), and mix well to combine.
Step 4: Assemble the ingredients
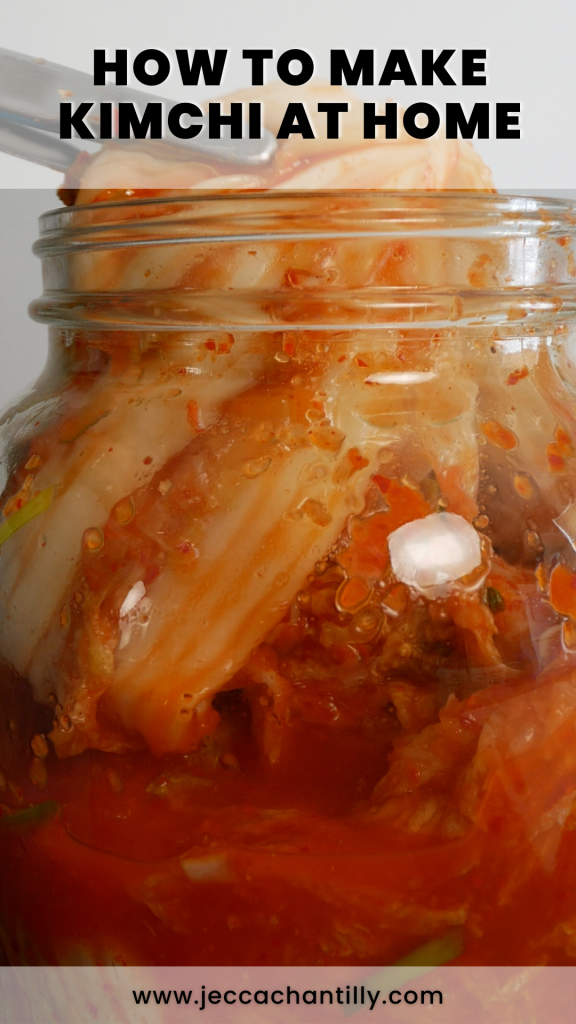
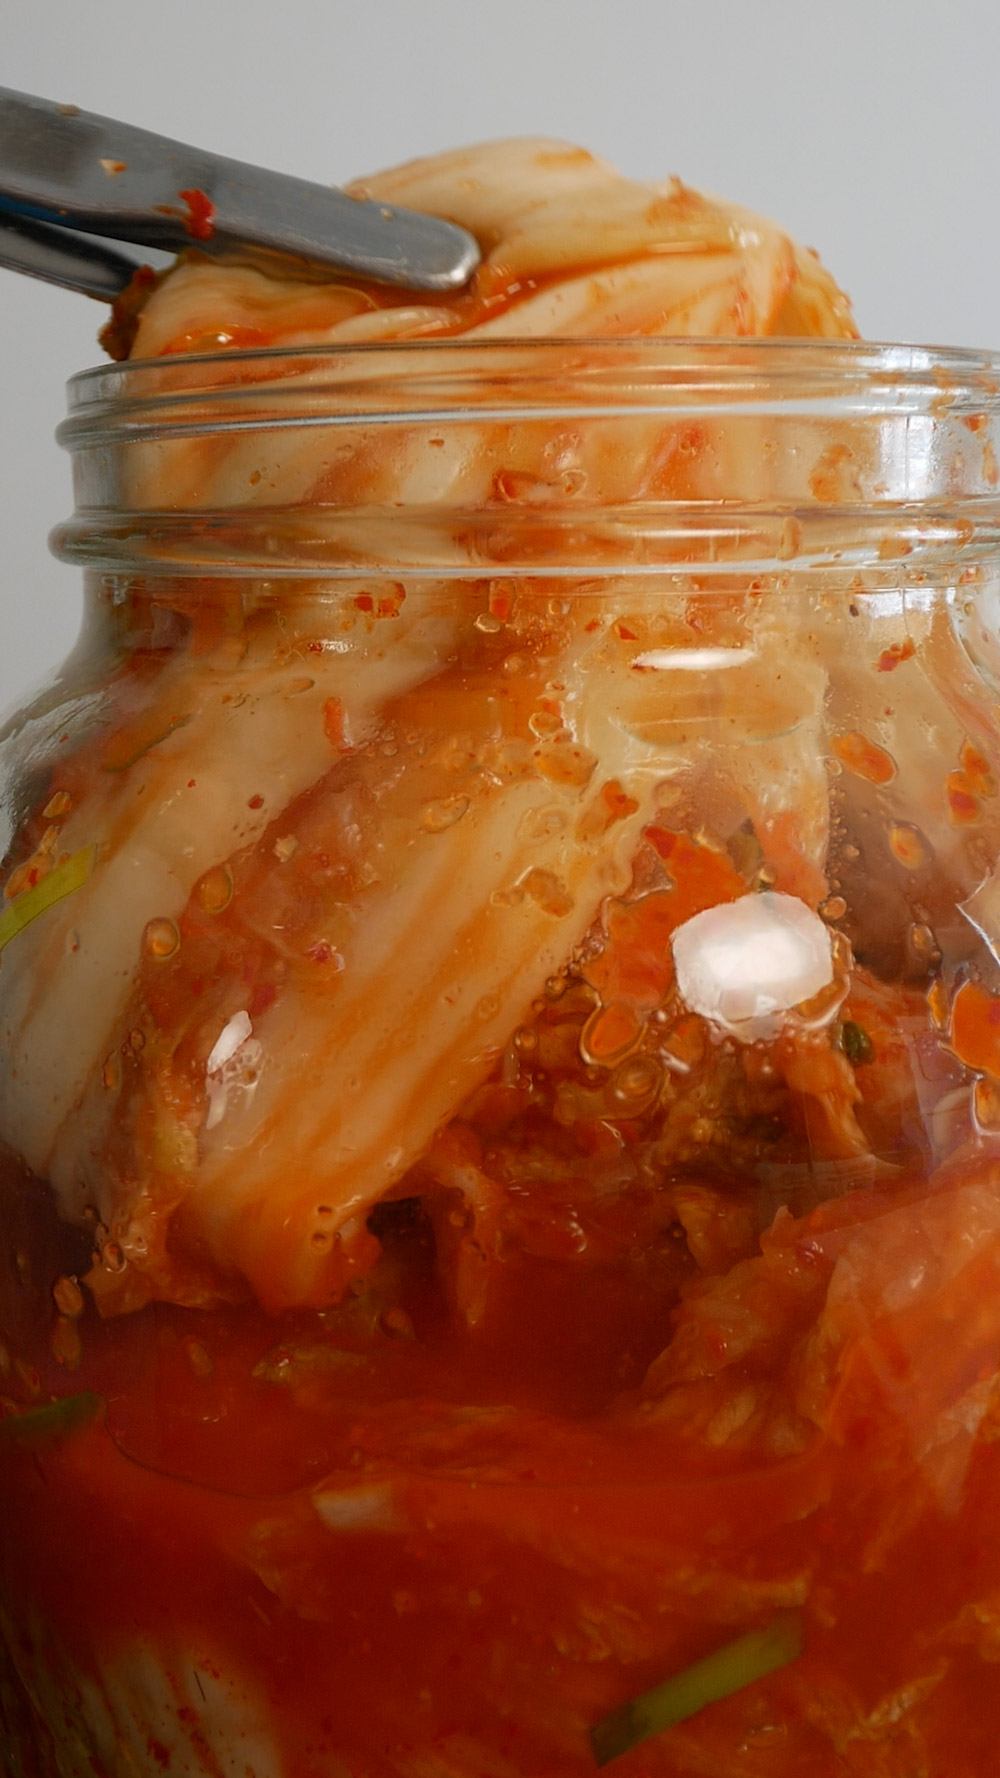
Take a small handful of sauce and rub it into each layer of cabbage. Make sure most of the sauce is applied to the cabbage head instead of the leaves. Since the cabbage head is thicker than the leafy area, this will help better absorb the flavors. Transfer the cabbage to a glass jar and repeat until all cabbage is done.
Close the lid of the jar tightly and allow them to let them ferment at room temperature for 1 to 3 days before storing them in the fridge. Keep in mind that the longer it sits at room temperature, the more fermented it will be.
Preparation Tips for Kimchi
Preparing kimchi at home isn’t as complicated as you think! Here are some helpful tips to help you get started:
- Remember to wear gloves when rubbing the sauce onto the cabbage to prevent your hands from burning! Don’t forget that the sauce is packed with spices.
- The kimchi will ferment faster if you leave it out at room temperature. But if you want to slow down the fermentation process, you can also place the jars in the fridge after 1 day.
- For 2 cups of anchovy stock, combine 8 dried anchovies (innards removed), a 5×5 sheet of kelp, half a medium-sized onion, and 6 cups of water. Boil for 20-30 minutes before straining. You can also substitute the anchovy stock with water.
Ingredient Substitutions
Korean radish: Korean radish helps with the fermentation process and adds a natural sweetness to the kimchi. If they’re not accessible, you can also use daikon or omit it completely.
Gochugaru: Gochugaru is a type of Korean red chili flake that gives the recipe a distinct spicy taste. This is an essential ingredient in kimchi so I don’t recommend any substitutions
Fish sauce: traditional kimchi uses fish sauce in the recipe for its savory and umami flavors however, you can substitute it with soy sauce.
Anchovy stock: the anchovy stock adds umami flavor to the kimchi but you can also substitute it with vegetable stock or water.
Frequently Asked Questions
Do you need to sterilize the jar for kimchi?
There’s no need to sterilize the jars you’re using for kimchi as long as they’re clean. Because the kimchi continues fermenting, the salt in the sauce will overpower any bad bacteria from growing. Plus, the good bacteria that are naturally present in the cabbage leaves will also make the mixture highly acidic, which will make it unsuitable for bad bacteria to thrive.
After giving the jars a thorough hot wash, let them air dry completely before using.
How long does homemade kimchi last?
If prepared and stored properly, homemade kimchi can last for up to 6 months in the refrigerator. Just remember that kimchi will continue to ferment, even when stored in the fridge, so the longer it sits, the sourer it becomes.
Make sure to refrigerate the kimchi after 1 to 3 days of fermenting at room temperature to prevent it from going bad. Exposure to air and warm temperatures are major factors for spoilage so storing it in the fridge will ensure its freshness.
What can I eat with Kimchi?
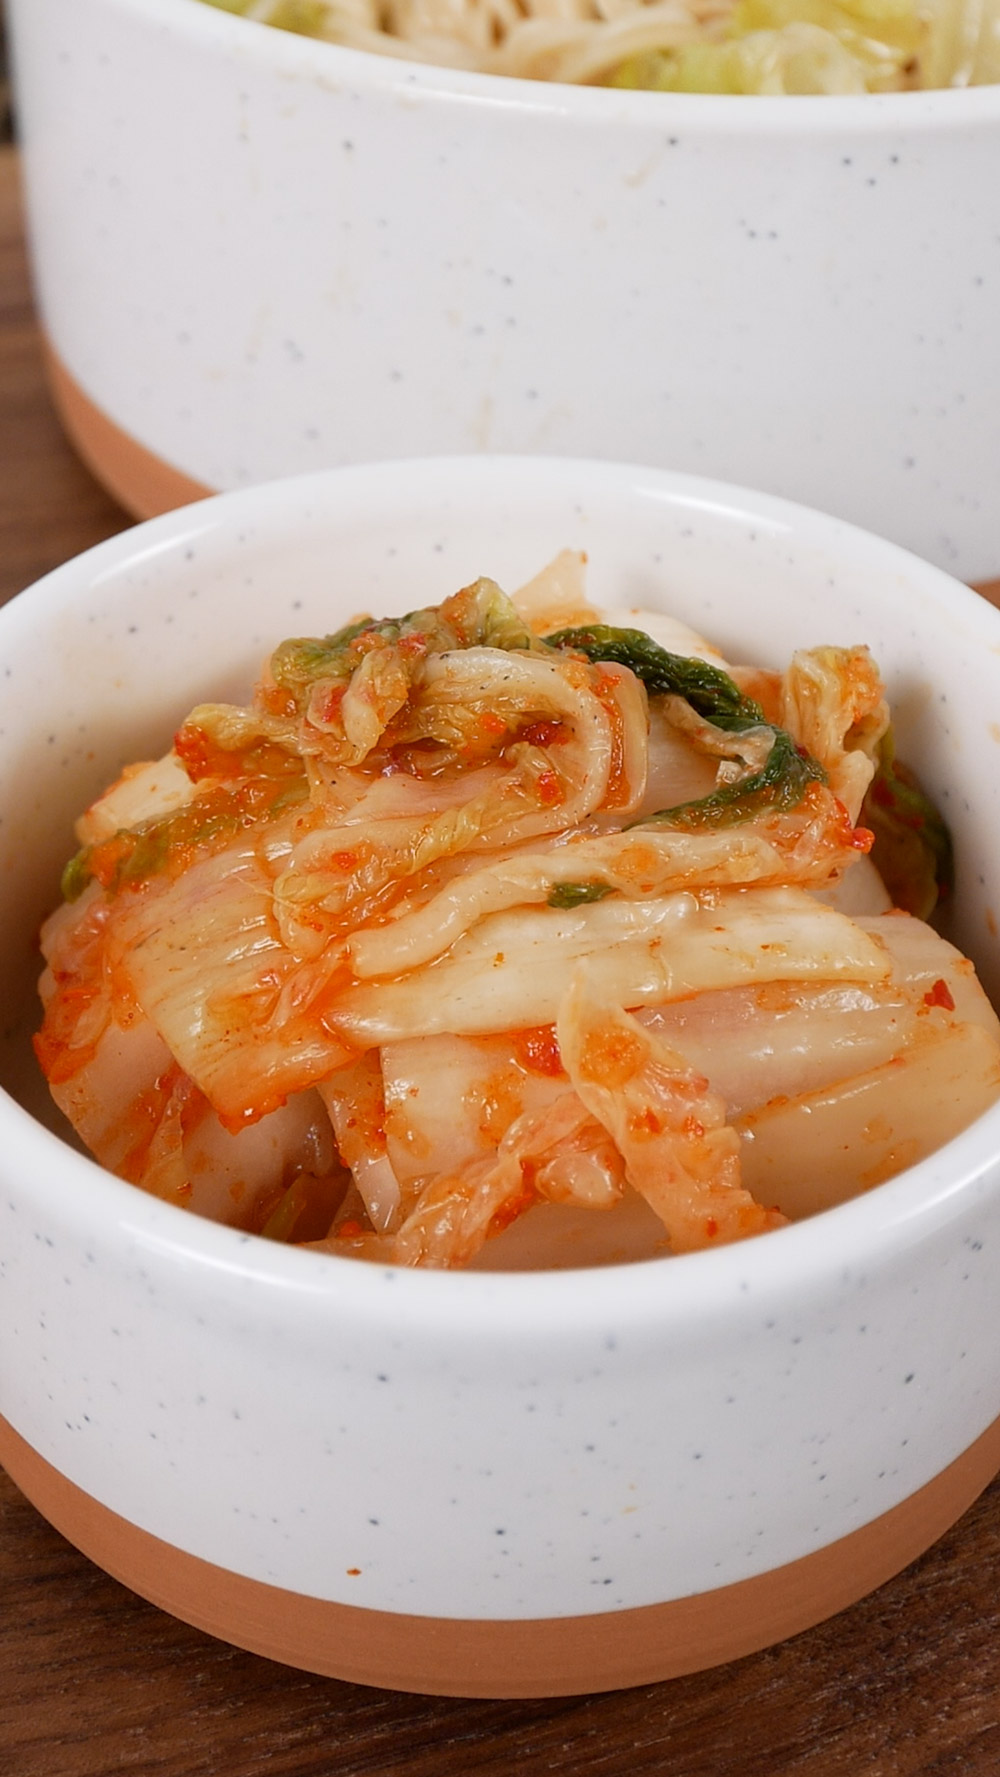
Kimchi is traditionally served as a side dish to be enjoyed with your meal. However, it is commonly used in a variety of dishes due to its versatility and bold flavors.
1. Stew – if you’re looking for a hearty meal for a cold day, adding kimchi to stews will give it a spicy kick that will immediately warm you up. Check out my Kimchi Jjigae recipe here!
2. Fried rice – If you have plenty of leftover rice, why not turn it into a tasty fried rice dish? Try my Kimchi Bokkeumbap recipe for a quick and easy meal!
3. French fries – To deviate from classic dishes, treat yourself to overloaded french fries that are jam-packed with several layers of flavors. Check out my Loaded Kimchi Fries recipe for the ultimate flavor bomb.
Check out my other Kimchi recipes below!
- Spam Onigirazu with Kimchi
- Kimchi Alfredo Pasta
- Geotjeori Kimchi (Fresh Cabbage Kimchi)
- Kimchi Breakfast Crunchwrap
- Crispy Beer Battered Fish Tacos with Kimchi Slaw
- Kimchi Seafood Pancake (Kimchi Jeon)
How to Make Easy Kimchi
Ingredients
- 4 napa cabbages
Brine
- 8-10 cups water
- 1/4 cup salt
Sauce
- 30-40 garlic cloves
- 5-6 inch nub of ginger sliced
- 1 1/2 onions chopped
- 1 lb korean radish chopped
- 8-10 scallions chopped
- 1 1/2 cup gochugaru Korean red pepper flakes
- 3-4 tbsp sugar
- 1/4 cup salt
- 1 1/2 cup fish sauce
- 2 cups anchovy stock or water
Instructions
- Prepare the brine by filling up a big bucket with water and 1/4 cup of salt. The brine should be salty to taste so adjust the salt accordingly.
- Cut the napa cabbages in half then into quarters and slightly wet them so the salt adheres better.
- Generously salt in between the layers of the cabbage heads and place them in the brine.
- Let the cabbage brine for 8-16 hours before rinsing with water and draining. Make sure to squeeze all the excess water out.
- For the sauce, combine sliced ginger, garlic, chopped onion, and chopped radish into a blender. Fill with water about half way and blend until smooth.
- Transfer to a large bucket with chopped scallions. Add the sugar, fish sauce, gochugaru, salt, and anchovy stock. Adjust the seasoning to your taste.
- Take a small handful of the sauce and rub it into each layer of cabbage. Make sure most of it is added to the cabbage head instead of the leaves.Transfer to a glass jar and repeat.
- Transfer to a glass jar and repeat.
- Let this ferment for 1-3 days and enjoy!
Notes
2. For 2 cups of anchovy stock, combine 8 dried anchovies (innards removed), 1 5×5 sheet of kelp, half an onion, and 6 cups of water. Boil for 20 to 30 minutes then strain. The anchovy stock can be substituted with vegetable stock or water.
Pin & save this recipe for later!