
Eggs are a staple ingredient in every culture and are prepared in hundreds of different ways. Korean and Japanese cultures share a similar decadent egg recipe ~ soy cured egg yolks! Not surprisingly, they just happen to be one of my favorite ways to enjoy eggs!

What are Soy Cured Egg Yolks?
Soy cured egg yolks are a very popular food in Korea and Japan and it is essentially raw egg yolks that are cured or pickled in soy sauce, sugar, and mirin or cooking wine.
Instead of using the whole egg, the egg white and egg yolk are first separated. The raw egg yolks are then cured in a sweet and savory soy sauce mixture until they are slightly firm on the exterior. The high salt concentration in the curing solution draws water from the exterior of the egg yolk and forms a thin, intensely flavored “shell” around an ooey-gooey interior.
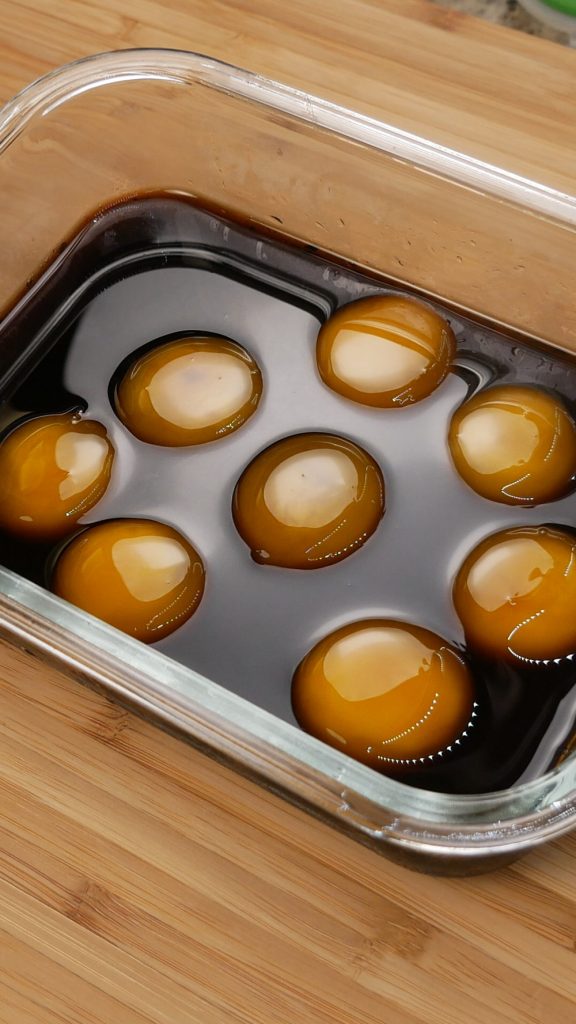
As the egg yolks sit in the soy sauce marinade, they absorb the flavors of the mixture and develop a deep yellow or orange hue. After about 12 hours of marinating, the egg yolks are ready to eat! The sooner you take them out, the runnier the egg yolk will be.
However, the longer you let it cure, the more gel-like consistency and texture it will have. You can cure it for up to 48 hours, but remember that the longer it cures, the more concentrated and salty the flavors will be.
Why you’ll love this recipe
Soy cured egg yolks are one of those meals that will have you yearning for more, from the simplicity of preparation to the irresistible taste. This is one of the simplest recipes I have made, but it’s also one that I make time and time again.
When prepared in advance, this is the ideal go-to quick and easy weeknight meal. No cooking is involved (except for rice) which makes it convenient and hassle-free. Rice is an essential accompaniment to this dish and I guarantee that you’ll need a lot of it! Whenever I make this, I expect to go through at least two bowls of rice, because it’s just THAT good and indulgent. Not only can you serve these eggs with rice, but you can also enjoy them with pasta, ramen, poke bowls, and toast!
The garnishes can also be easily customized according to what you like. I personally like sliced scallions for some freshness and crushed nori for an extra layer of umami flavor. You can also completely omit these two toppings or substitute them with your favorite ingredients including sesame seeds, furikake seasoning, and even garlic chips!
I promise these soy cured egg yolks will taste amazing especially when swirled into a fresh bowl of steamed white rice. Other ways you can enjoy these soy cured egg yolks include topping it on congee, spreading it on toasted bread, or as an additional topping for your avocado toast with a bit of chili oil.
Soy Cured Egg Yolks Ingredients & Substitutions
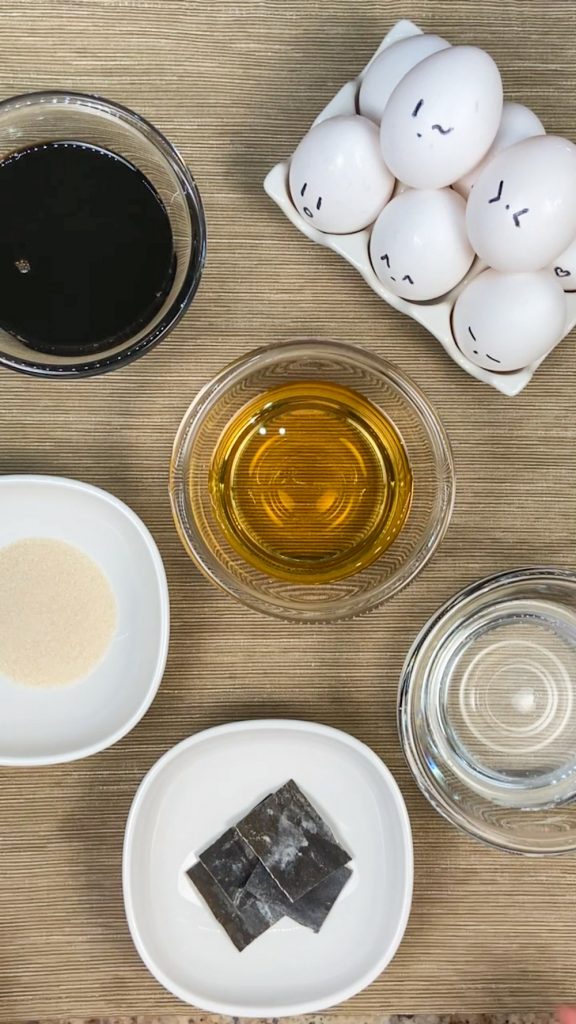
Egg Yolks – as the star of this recipe, you want to use the freshest and highest quality eggs that you can find. It will make all the difference!
Soy Sauce – soy sauce carries most of the flavors and helps cure the eggs with its high sodium content. If you wanted to reduce the overall saltiness of the brine, you could use low-sodium soy sauce instead.
Mirin – mirin adds sweetness, tanginess, and umami to the brine. You could substitute mirin with sake.
Dried Kelp (Kombu) – in addition to the soy sauce, the concentrated flavors of the dried kelp add a savory taste. You could substitute dried kelp with bonito flakes or dried shiitake mushrooms.
Sugar – the sugar is added to counteract the saltiness and savoriness of the soy sauce and dried kelp. You could also use brown sugar or honey as a substitute. If using honey, I recommend wildflower honey for its neutral taste.
Scallions & Nori (roasted seaweed) – for garnish, I like scallions for freshness and to help cut through the richness of the eggs. I also like using salted seaweed because it adds another layer of deep umami flavor.

How to Make Soy Cured Egg Yolks
There are many versions of soy cured egg yolk recipes. However, my simple yet delicious recipe has various flavor dimensions and to be honest – it’s insanely addicting. If this is your first time making this, follow my step-by-step guide below!
Step 1: Make the soy sauce marinade.
The very first step is to make the soy sauce marinade.
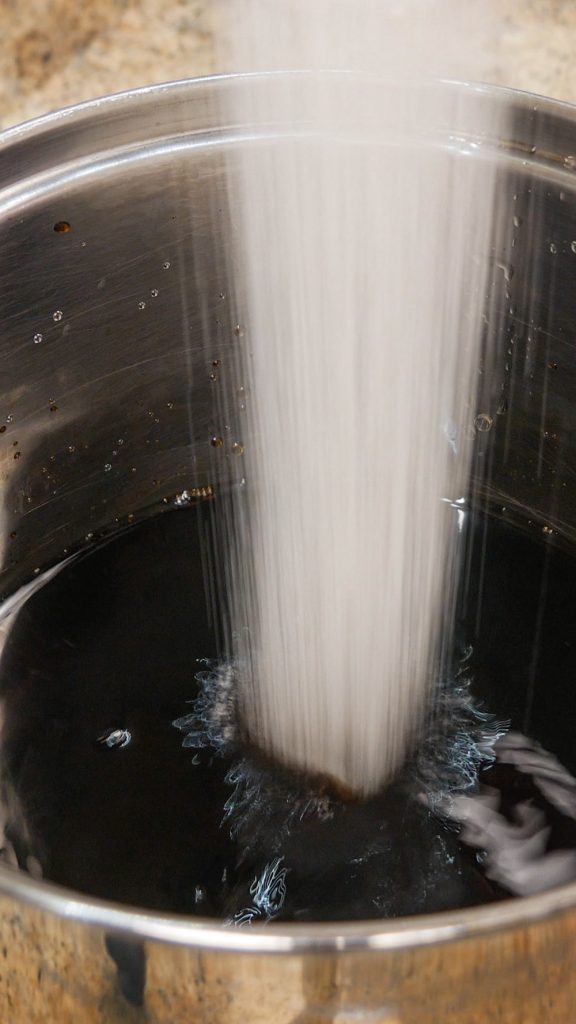
Simply combine the soy sauce, mirin (substitute with sake), water, dried kelp (also known as kombu), and sugar in a pot. Stir and bring to a boil then reduce to a simmer. Simmer for about 2 minutes.
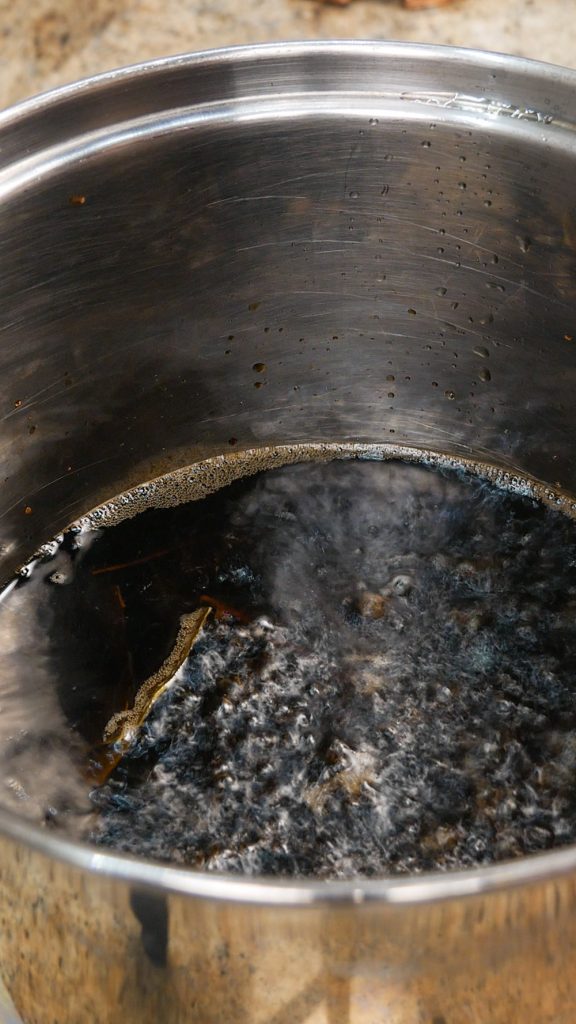
Remove from the heat then set it aside and allow it to cool completely.

Step 2: Prepare the eggs.
While the soy sauce mixture is cooling down, we can begin preparing the star of the dish – the eggs!
All you need to do is separate the egg yolks from the egg whites using any method that works best for you. There are kitchen tools that can help you do this, but you don’t really need any special tool or gadget to do this. You can simply use your hands or the shells of the eggs to help you separate them.
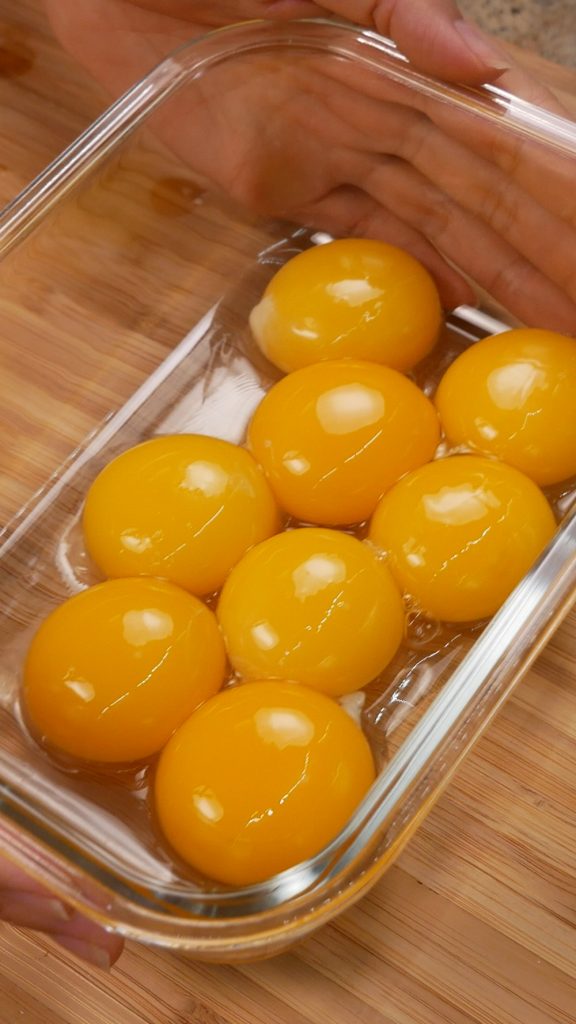
To separate the egg yolks by hand, start by cracking the egg into your palm. Let the egg whites drip through your fingers and into a bowl so that only the yolk remains in your hand. As you separate the yolk from the whites, place the egg yolks in a shallow container, preferably made of glass.
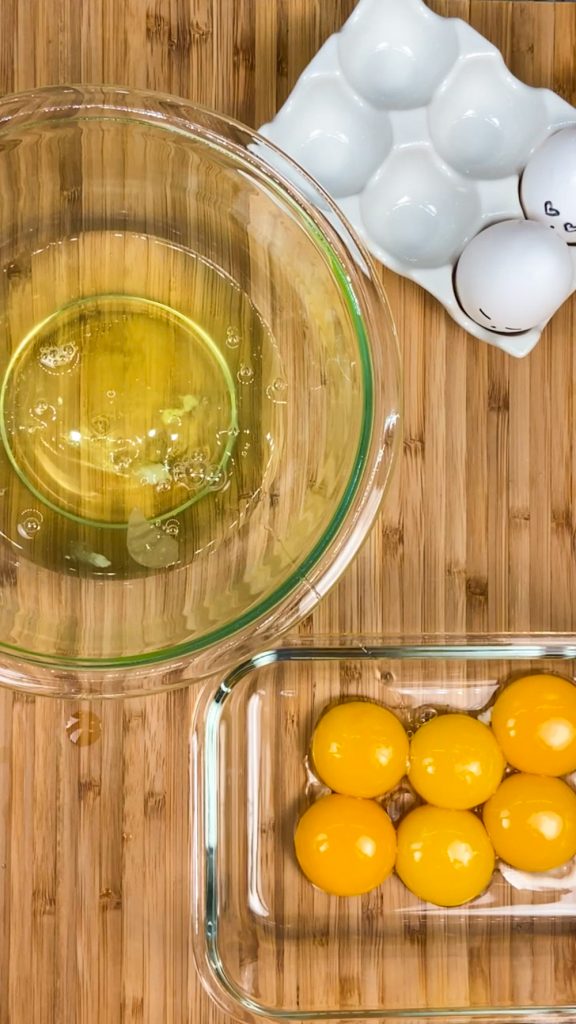
When working with the eggs, just be careful not to break the egg yolks. If they do break, you’ll have to use a new egg because you need whole egg yolks for this recipe to work. Don’t discard the broken egg yolk though – use it in another dish or recipe (like fried rice) so that you minimize waste!
The size of the container will depend on how many egg yolks you’ll be preparing. The key is to not overcrowd the container with egg yolks. They should be in one layer and still have enough room to move around.
Step 3: Combine the egg yolks and the soy sauce marinade.
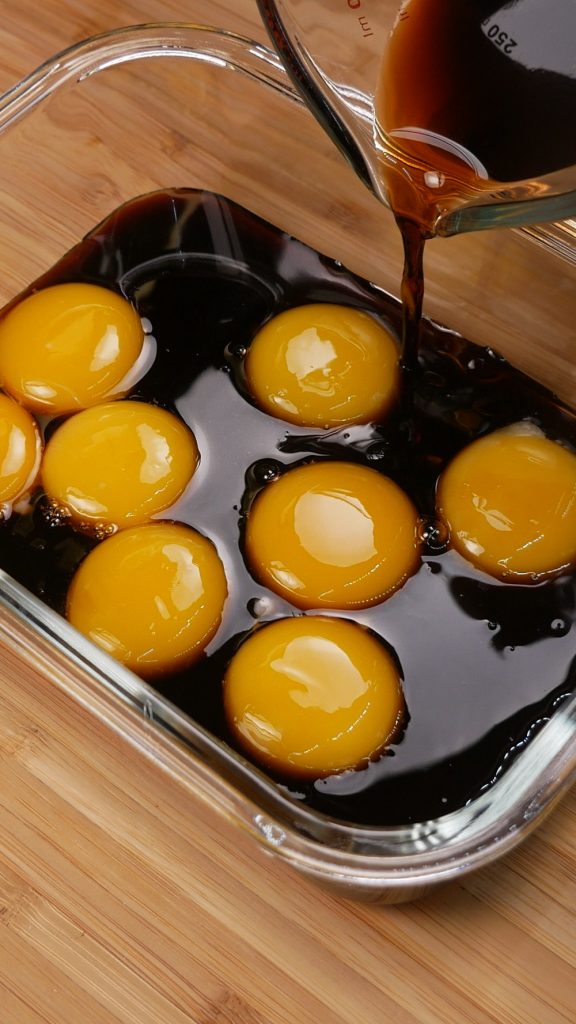
After separating all the egg yolks from the egg whites and the soy sauce mixture has completely cooled, it’s time to combine them together. Start by straining the dried kelp from the soy sauce brine.

Carefully and slowly pour the mixture into the container with the egg yolks. Avoid pouring the soy sauce brine directly on top of the egg yolks to prevent them from breaking. Instead, slowly stream it in on the side or corner of the container.
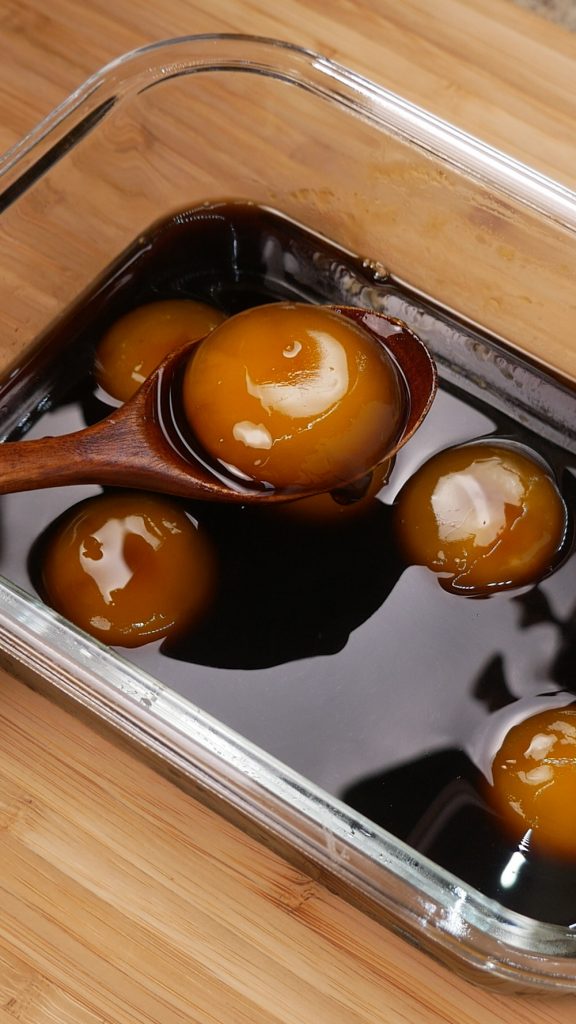
Step 4: Store in the fridge and marinate for at least 12 hours.
Once the eggs and soy sauce mixture have been combined, cover the container with a tight-seal lid then store in the fridge. I recommend letting it sit and cure for at least 12 hours or up to 48 hours depending on how you like the egg yolks.

To ensure both sides of the egg yolks are evenly cured, flip the egg yolks every 12 hours. Alternatively, you can lay a sheet of paper towel on top of the eggs and gently press down until it is soaked in the brine. This will ensure that the top of the egg yolks is fully submerged for an even cure. If you use the latter method, you won’t need to flip the eggs every 12 hours!
Step 5: Serve and enjoy!
As the egg yolks are curing, just remember that the longer they stay in the brine, the firmer the exterior and the more gel-like the center will be. If you prefer runnier eggs, you can scoop them out from the brine within 12 to 24 hours. The egg yolks will also continue to absorb the flavors of the brine and they will get saltier the longer they cure.
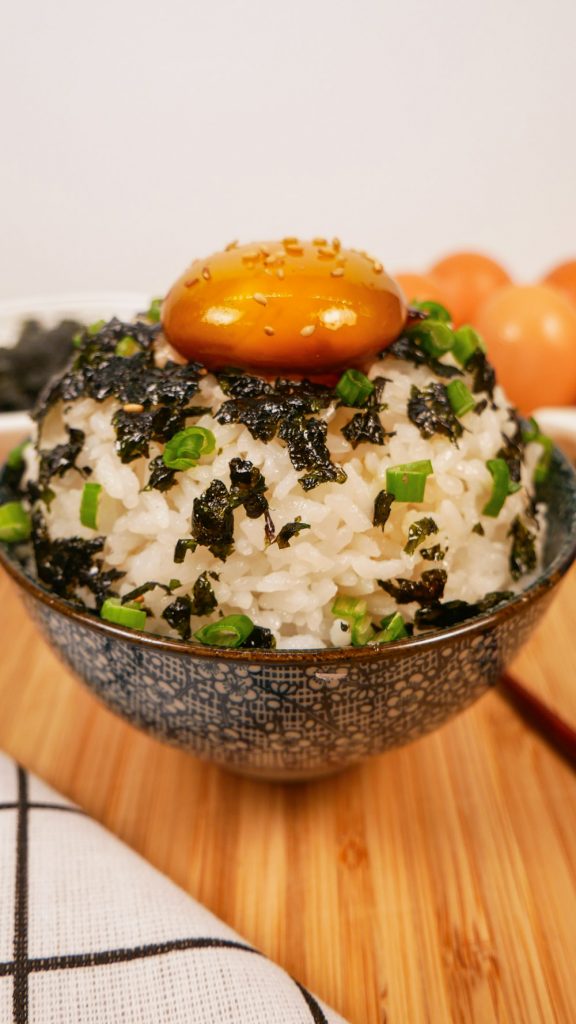
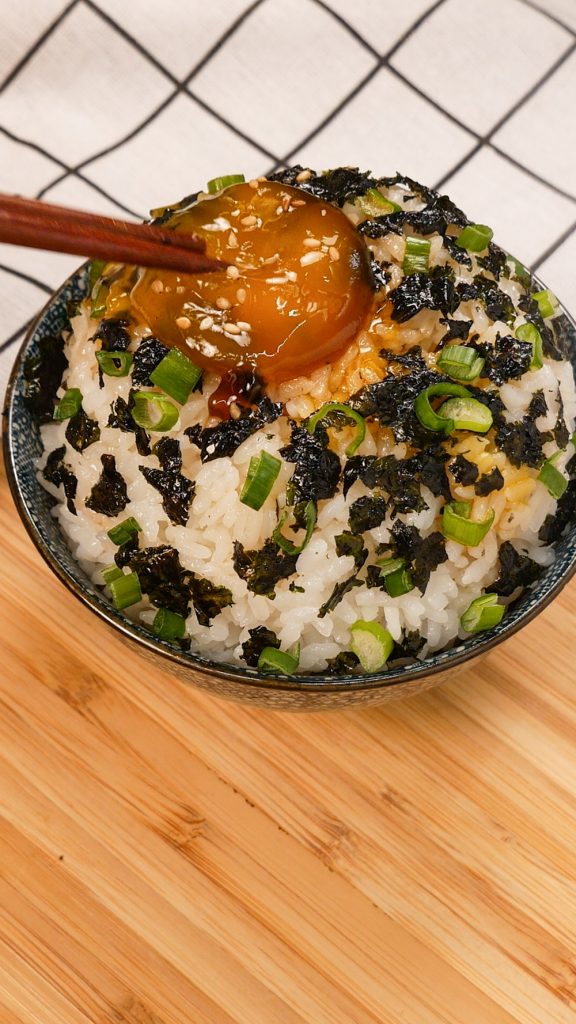
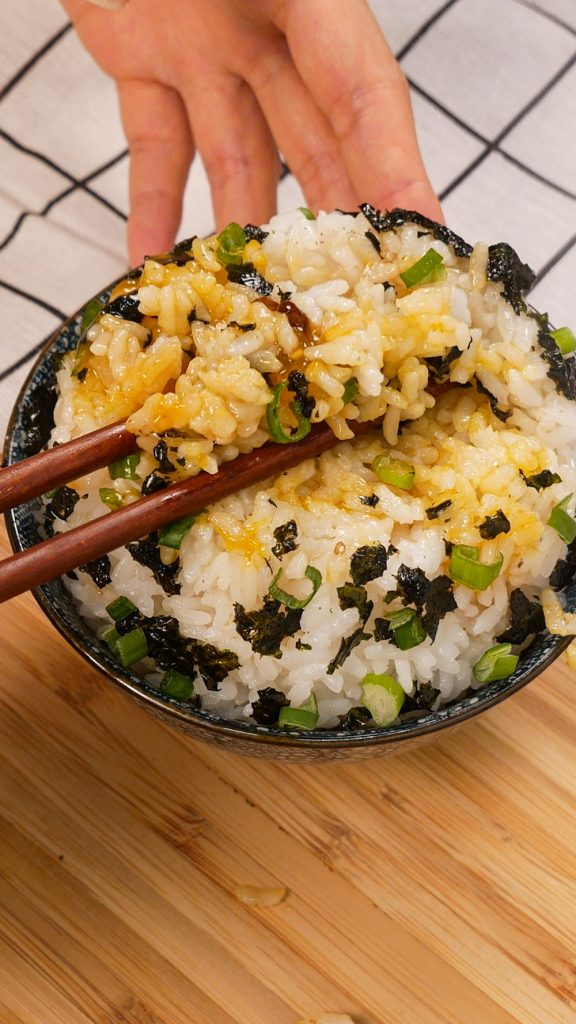
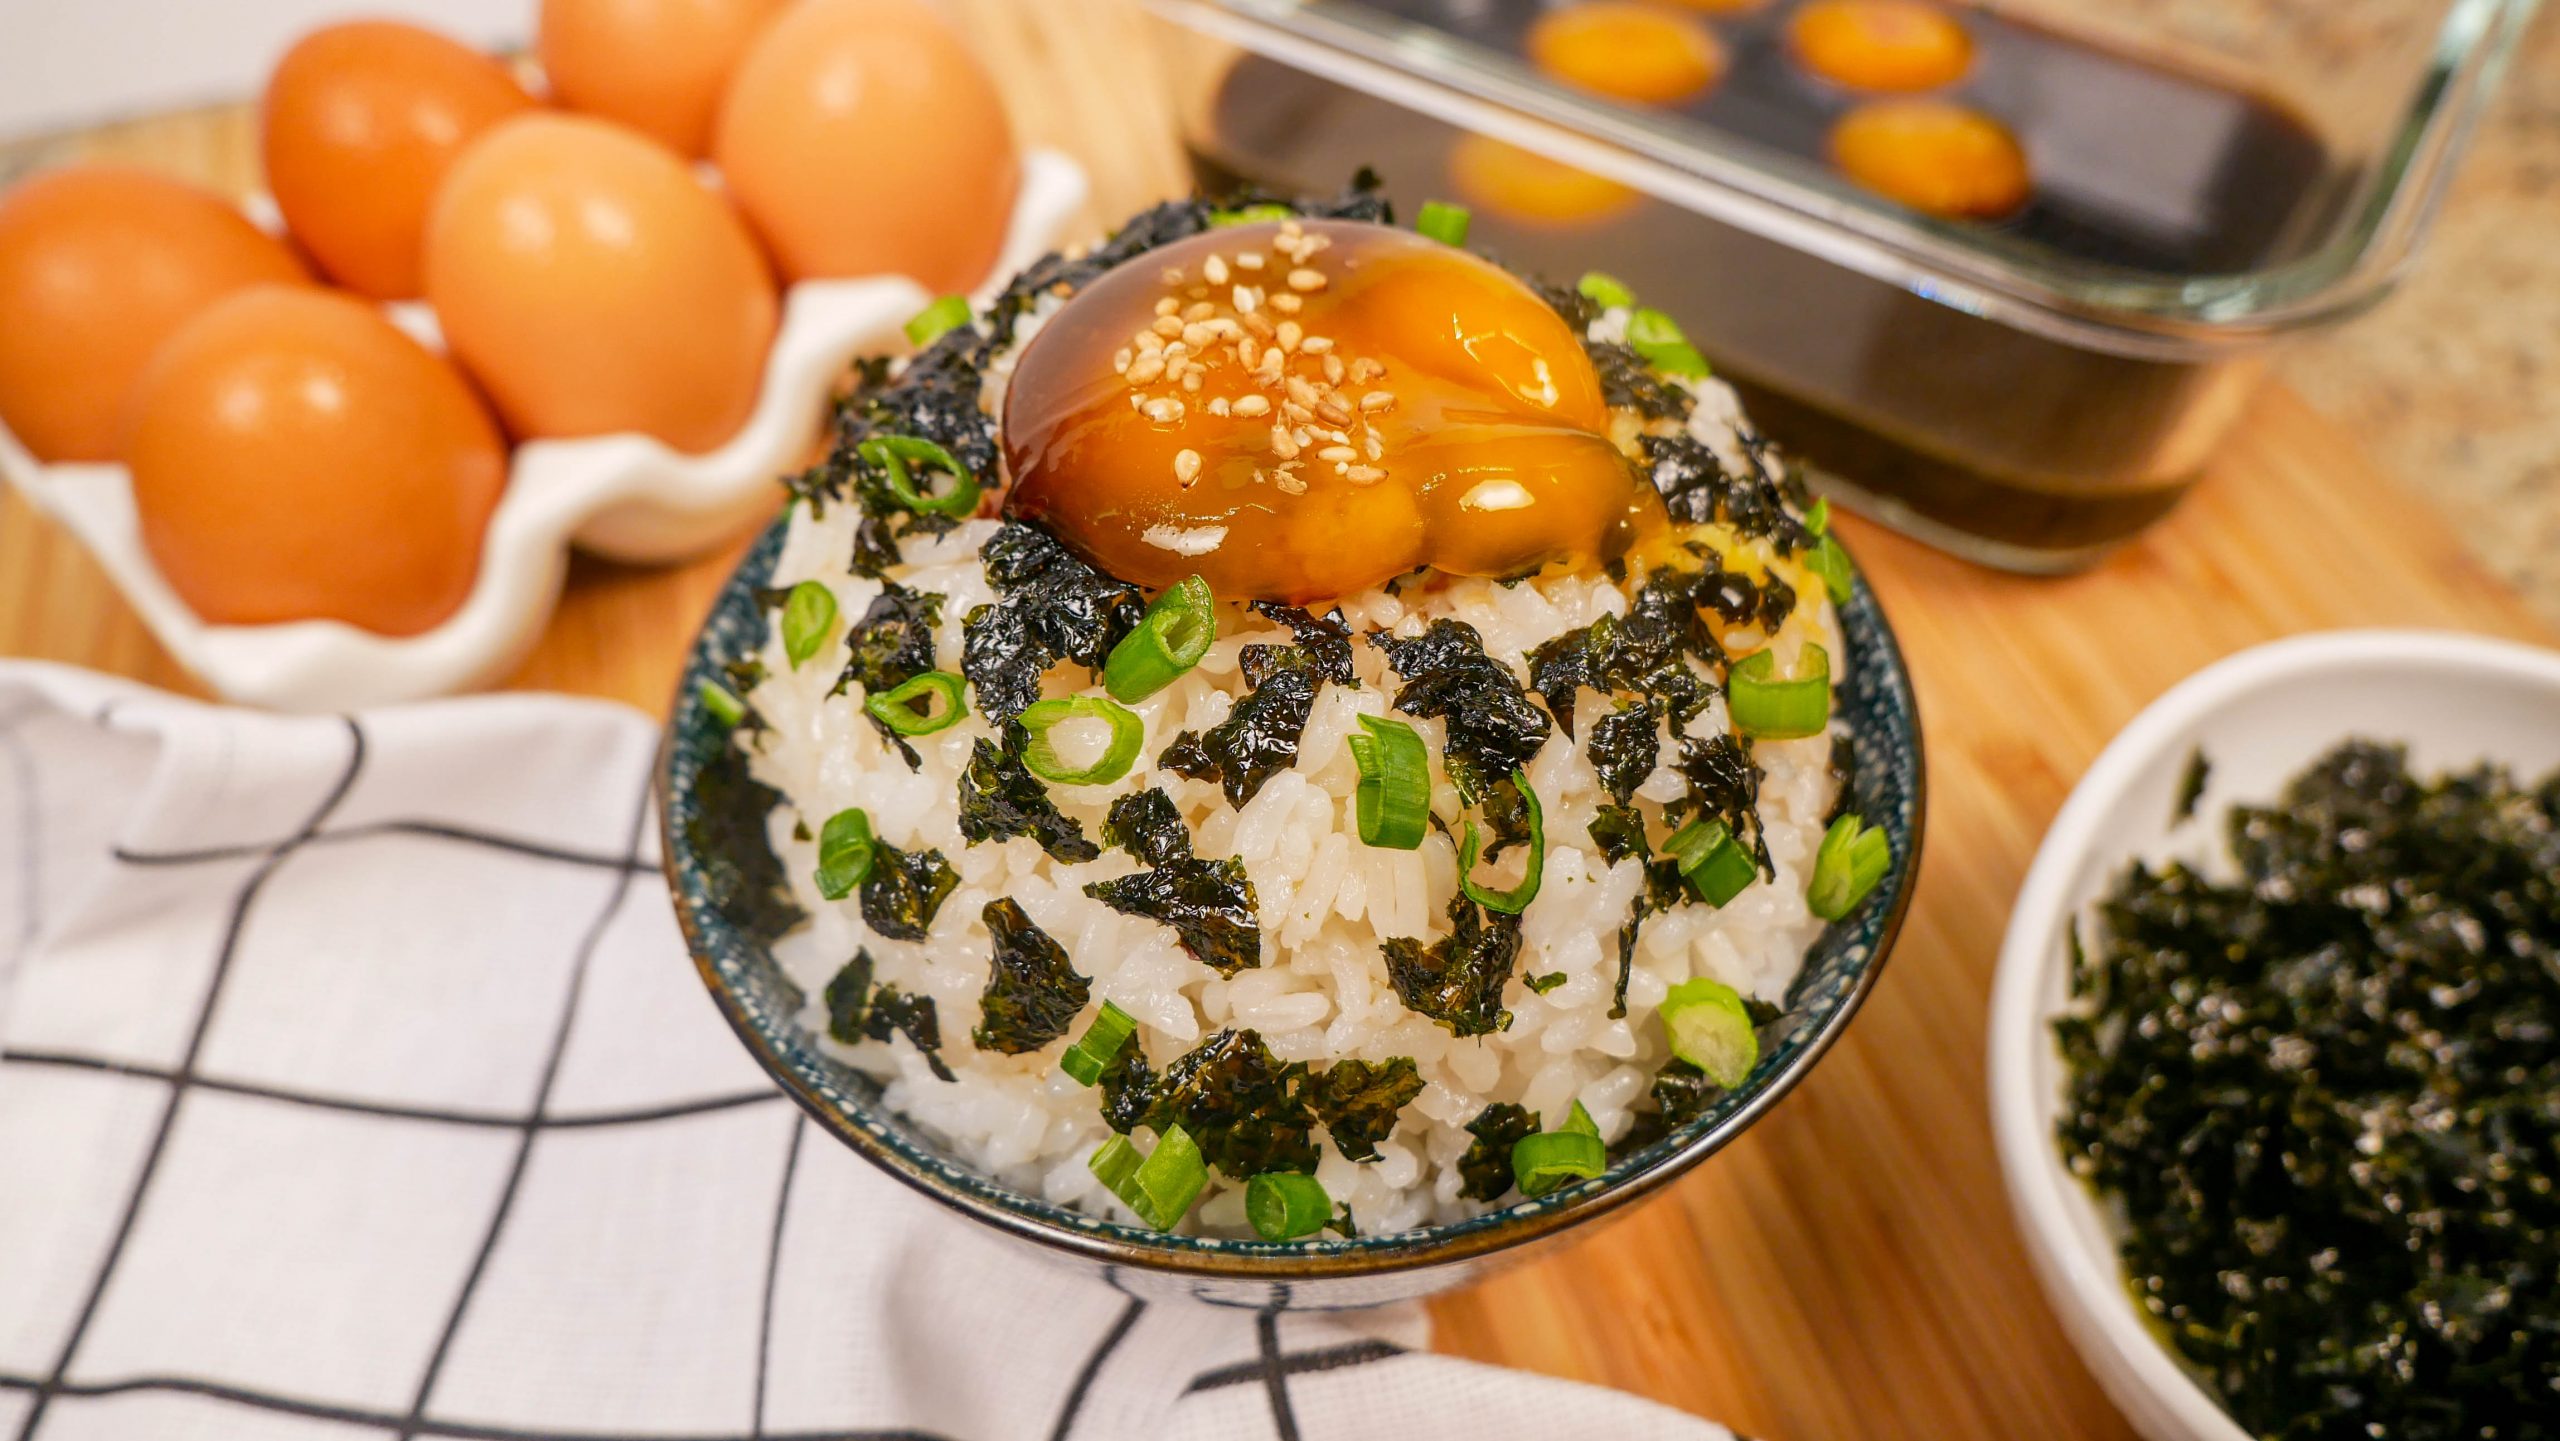
To serve, prepare a bowl of cooked rice (I like using short-grain rice for its starchiness). Next, drizzle 1 teaspoon of sesame oil over the rice. Garnish with nori and chopped scallions then finally top with a soy cured egg yolk.


I also like sprinkling some sesame seeds on top but this is optional. Mix the egg yolk into the rice and enjoy! The egg yolks will have a nice, rich melt-in-your-mouth texture with a pleasant hint of soy sauce, mirin, and sugar. I usually need an extra bowl of rice when I eat this because it is just SO GOOD!
Frequently Asked Questions
What can I substitute mirin for?
Mirin adds complexity and a slightly sweet flavor to the soy marinade, however, as a substitute you can use sake, which has a similar effect. For a non-alcoholic alternative, you can use rice vinegar or skip it completely. For every teaspoon of mirin, you’ll want to use 1 teaspoon of rice vinegar mixed with 1/2 teaspoon of sugar.
Is soy cured egg yolk safe to eat?
Although the egg yolks used in this recipe are not cooked, it is generally safe to eat due to the curing process. ‘Curing’ is the process of preserving food by coating it in a dry or wet salt mixture. The soy sauce mixture has a high salt content which ‘cures’ the egg yolks by drawing out the water or ‘moisture’, thus preventing the growth of bacteria and spoilage.
How long can egg yolks be soy cured for?
The egg yolks can be cured for up to 72 hours or 3 days. Keep in mind that the longer it cures, the saltier and more gel-like the egg yolks will be. If you prefer a runnier soy cured egg yolk, 12 hours is the perfect curing time. If you’d prefer the egg yolk slightly runny but slightly gelly, aim for 24 to 48 hours. I personally think 48 hours is just right but this is all based on preference.
Looking for more easy and delicious recipes? Here are some of my favorites!
- Lap Cheong Fried Rice
- Mentaiko Udon
- Spicy Asian Cucumber Salad
- Chili Oil Ramen
- Mushroom Rice Bowl
- Korean Silken Tofu
- Chinese Tea Eggs
Soy Cured Egg Yolks Recipe
Ingredients
- 8 egg yolks
- 1/2 cup soy sauce
- 1/2 cup mirin or sake
- 1/2 cup water
- 3 one-inch pieces of kelp or kombu
- 1 tbsp sugar
- 1 tsp sesame oil
- Chopped scallions for garnish
- Crushed nori for garnish
Instructions
- In a pot, combine soy sauce, mirin, water, dried kelp, and sugar.
- Bring to a boil then reduce to a simmer for 2 minutes. Remove from heat and set aside to cool completely.
- While the soy sauce brine is cooling, prepare the eggs. Separate the egg yolks from the egg whites. Place the egg yolks in a container, preferably glass. one. Do not overcrowd the container – the egg yolks should be in a single layer with room to move around.
- Once the soy sauce brine has cooled, strain the kelp. Carefully pour the brine into the container with the egg yolks. Be careful not to pour the brine directly onto the egg yolks. Instead, pour it in at the corner or side to prevent the egg yolks from popping.
- Cover the container and place it in the fridge for at least 12 hours or up to 48 hours. To ensure both sides of the egg yolks are evenly cured, flip the egg yolks every 12 hours. Alternatively, you can lay a sheet of paper towel on top of the eggs and gently press down until it is soaked in the brine. This will ensure that the top of the egg yolks is fully submerged for an even cure. If you use the latter method, you won't need to flip the eggs every 12 hours!
- *Note: The egg yolks will form a gel-like consistency the longer they sit and cure in the soy sauce brine. If you prefer a runnier egg yolk, the eggs should be ready to eat within 12 to 24 hours.
- Serve with a fresh bowl of rice and your favorite toppings, like scallions and nori.
Video
Notes
- The egg yolks will form a gel-like consistency the longer they sit and cure in the soy sauce seasoning. If you prefer a runnier egg yolk, I recommend eating it after 12 to 24 hours. Keep in mind that the longer it marinates, the saltier the egg will be.
- Bonito flakes and dried shiitake mushrooms are good alternatives to dried kelp. Using a combination of both will amplify the flavor even more!
- Adjust the ratio of the ingredients according to your preference. For instance, you can add more or less sugar to adjust the sweetness.
- Since only a few ingredients are needed for this recipe, I recommend using the freshest and highest-quality eggs.
Pin & save this recipe for later!

What a delicious recipe~ I make this once a week! Thank you for sharing ^.^
Hi Jinnie! Thank you for trying my recipe out 🙂 So happy to hear that you enjoyed this one!!
What do you like to do with the leftover brine mix when you’ve eaten all the egg yolks? Going to try mine tonight, can’t wait!
Hi Jules! You can boil the leftover marinade then use it to marinate more egg yolks or use it as a sauce to enjoy with rice, noodles, or salad!
After the 48 hours and you take them out of the brine how long can they keep in the fridge before they go bad?
Hi Jaclyn! You want to keep the eggs in the brine and consumed within 3 days.