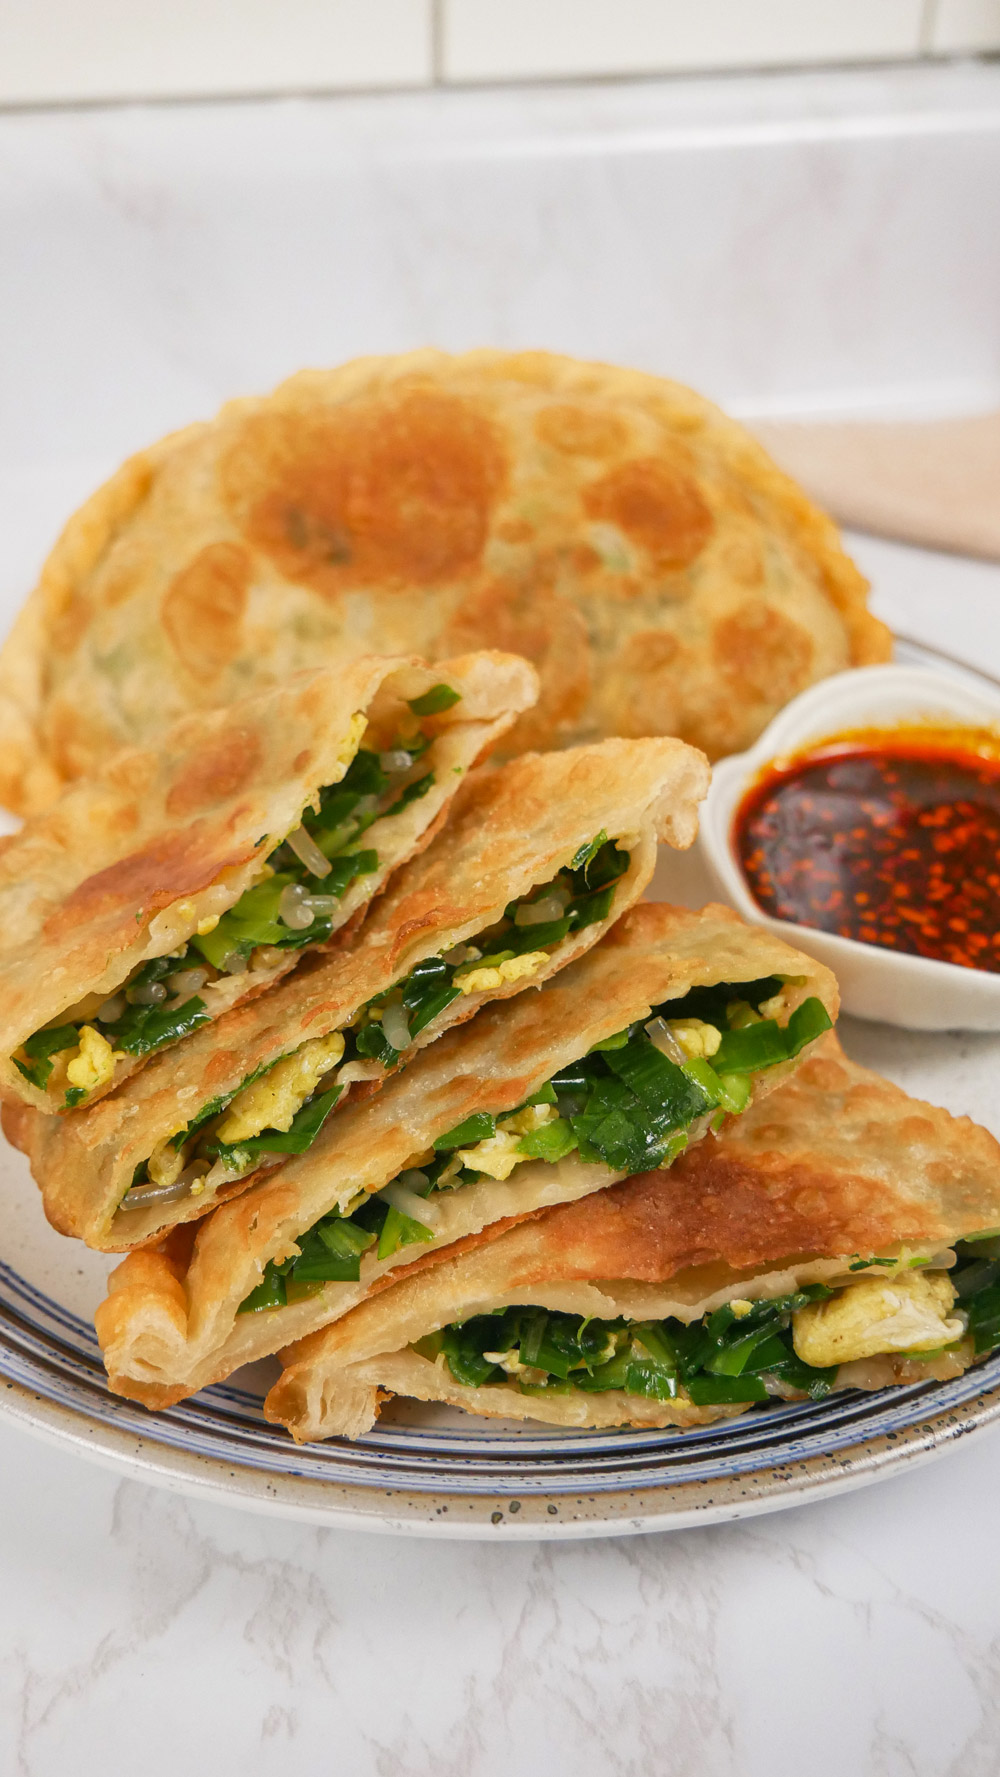
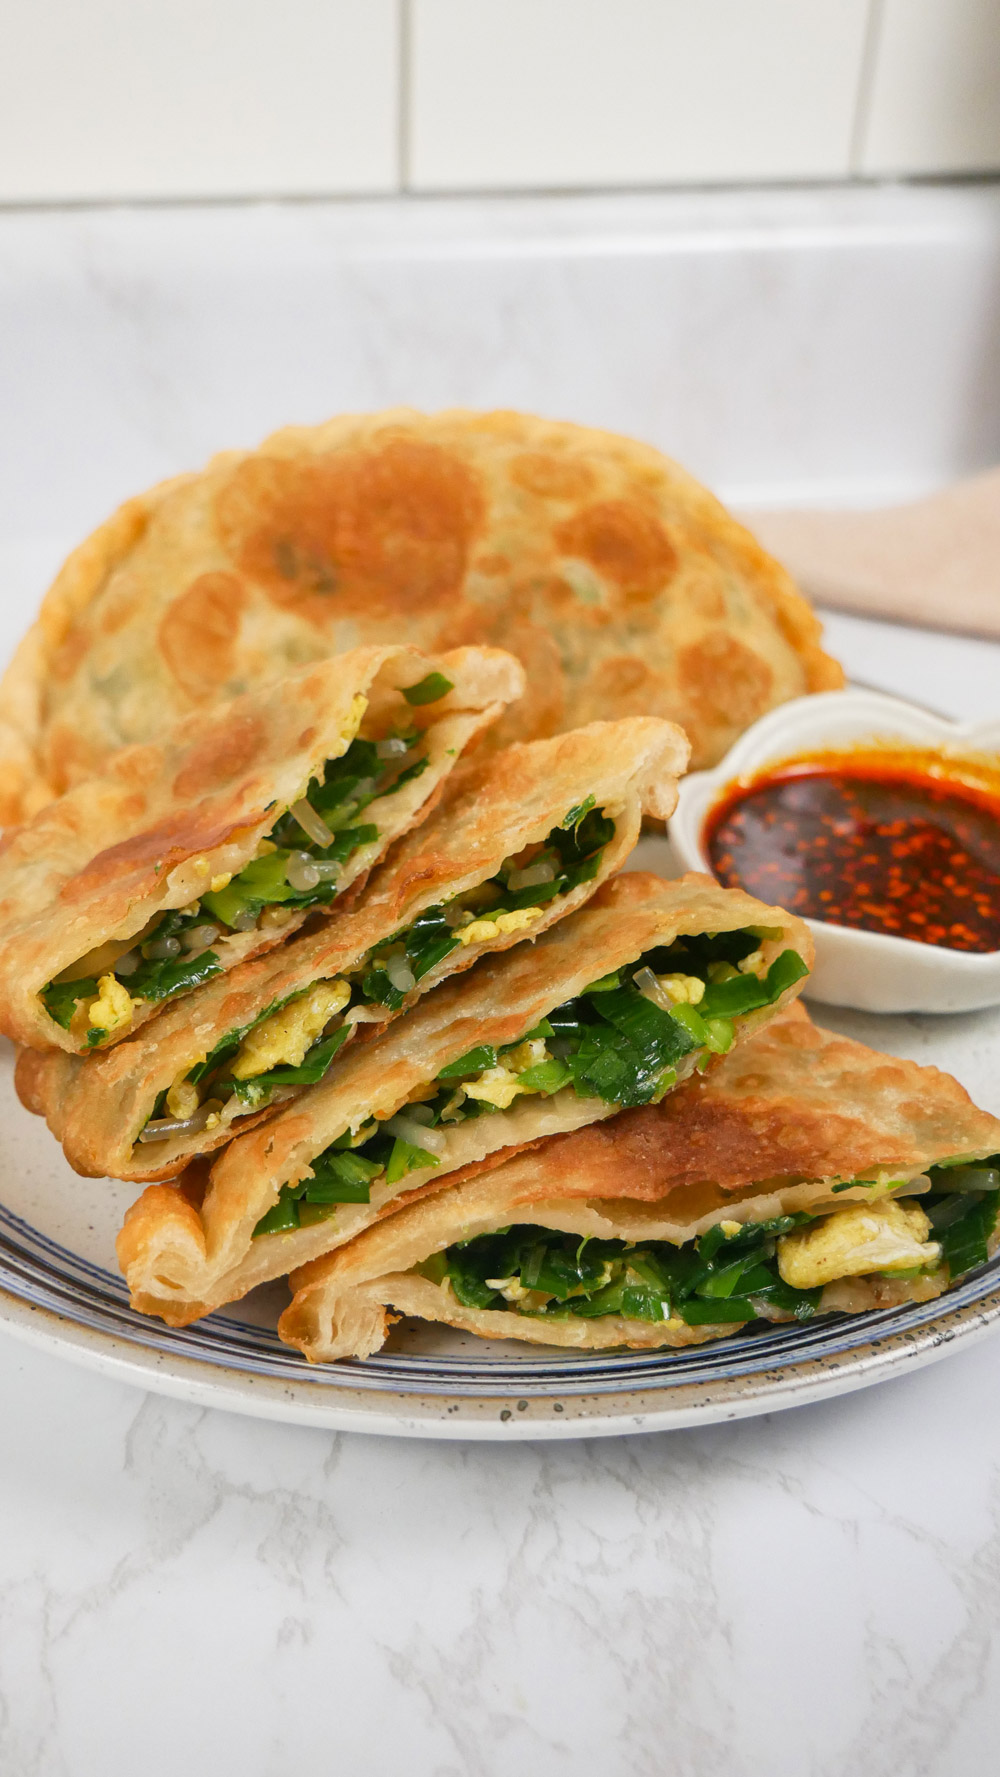
These chive and egg pockets or ‘boxes’ are a very popular Chinese snack and appetizer. Depending on the region in China, there are different variations in the filling however, one thing that they all have in common is the beautiful crispy golden exterior and savory and moist filling.
The very first time I had these chive and egg pockets was at a Shanghainese restaurant in my hometown Flushing, NY. They were filled with a ton of chives, eggs, vermicelli noodles, and dried shrimp and this combination of ingredients was so incredibly tasty. This recipe is heavily influenced and inspired by that experience, and I’m very excited to share it with you today!
Why you’ll love this recipe
The secret to making the filling extra flavorful is the dried shrimp. They are tiny flavor bombs that add umami to the filling, making it incredibly flavorful and delicious. While these chive and egg pockets can be enjoyed as is, I like serving them with an easy 3 ingredient chili oil dipping sauce made with soy sauce, black vinegar, and chili oil. This is optional, but highly recommended!
These pockets are also perfect for freezing, so you can make them ahead of time and have a quick breakfast, snack, or meal whenever you want. Just pan-fry or shallow-fry until golden and crispy on both sides, and that’s it!
Chive and Egg Pockets Ingredients & Substitutions
All-purpose flour: all-purpose flour is the base of the dough.
Salt: salt is used to season the dough and filling. Feel free to adjust the amount added to the filling according to your preferences.
Warm water: warm water helps form the dough. It’s important to use warm water instead of cold water because it makes the dough more malleable and easier to work with.
Neutral oil: any neutral oil will work well for making the dough, including avocado, corn, grapeseed, vegetable, canola, or sunflower seed oil. It’s also used to prepare the filling.
Chinese chives: Chinese chives, also known as garlic chives, have a mild “onion” flavor that pairs deliciously with eggs. Chinese chives are different from regular chives – they are flat and wide, and longer than regular chives.
Eggs: eggs are one of the main ingredients in the filling, so be sure to use fresh, high-quality eggs.
Dried shrimp: dried shrimp add a salty and umami flavor to the chive and egg pockets. You can omit them if you don’t have them but I highly recommend adding them if you can. They can be found in the refrigerated section of your local Asian market or on Amazon.
Vermicelli noodles: vermicelli noodles are added to make a heartier filling. I used mung bean vermicelli noodles but you can swap them out with other noodles, like glass noodles.
Sesame oil: sesame oil adds a rich, bold, and nutty flavor to the filling.
Oyster sauce: oyster sauce adds a savory and sweet flavor to the filling.
Chicken bouillon powder: chicken bouillon powder elevates the umami flavors of the filling. I like using the Lee Kum Kee brand. You can also use dashi powder or mushroom powder as a substitute.
Ground white pepper: white pepper adds a slightly peppery and floral flavor to the dish. You can also use ground black pepper as a substitute.
Soy sauce: soy sauce is the base for the dipping sauce. Feel free to use low-sodium soy sauce to reduce the saltiness without sacrificing flavor.
Chinese black vinegar: Chinese black vinegar adds a hint of tangy and sweet flavors to the sauce. You can substitute it with rice vinegar.
Chili oil: chili oil adds some heat to the dipping sauce. Feel free to use your preferred brand or use my Korean Chili Oil recipe!
How do I prepare Chive and Egg Pockets?
Here’s an easy step-by-step recipe to prepare these crispy and delicious chive and egg pockets:
Step 1: Mix the dough
In a bowl, combine all-purpose flour and salt. Whisk until combined.
Step 2: Make the dough
Pour the warm water over the flour mixture while stirring with a spatula or chopsticks until a shaggy dough forms. Add 1 tablespoon oil, then knead until a dough forms – which should take about 1 to 2 minutes.
Step 3: Allow the dough to rest
Cover with plastic wrap or a damp towel and allow the dough to rest for at least 30 minutes.
Step 4: Prepare the dried shrimp
While the dough is resting, start prepping the filling. Soak the dried shrimp in cold water to rehydrate for 10 to 15 minutes. Once rehydrated, finely chop then set aside.
Step 5: Chop the chives
Next, chop the chives, about 1/4 inch thick, then transfer them to a large mixing bowl.
Step 6: Cook the dried shrimp
In a non-stick pan, heat 1 tablespoon oil over medium heat. Once the oil is hot, add the dried shrimp and cook for about 1 minute. Transfer to the bowl with chives.
Step 7: Prepare the eggs
In a small mixing bowl, whisk together eggs and 1/4 tsp salt.
Step 8: Cook the eggs
In the same pan, add 1 tablespoon of oil then pour in the eggs while continuously stirring with a spatula or chopsticks in a circular motion. Cook until the eggs are no longer runny. Transfer to the bowl with chives.
Step 9: Add the rest of the ingredients
In the bowl with chives, dried shrimp and eggs, add the cooked vermicelli noodles, sesame oil, oyster sauce, chicken bouillon powder, 1/4 teaspoon salt, and white pepper powder. Mix together until well combined. At this point, taste for seasoning and adjust according to your preferences. Cover and set the filling aside.
*For the vermicelli noodles, cook it according to package instructions then strain and rinse under cold water. Cut into ¼ inch pieces.
Step 10: Weigh the dough
Take the rested dough and cut it into 6 equal pieces of dough (about 60 grams each). I recommend using a scale to weigh them out so they are accurate in size.
Step 11: Roll out the dough
Roll each piece of dough into a ball. Cover with plastic wrap and allow the dough to rest for 15 minutes. After 15 minutes, sprinkle flour over the surface area and onto the rolling pin. Roll each dough ball out very thinly into a wide oval shape.
Step 12: Add the filling
Take about 4 to 5 tablespoons of the filling and place it in the bottom half of the dough. Spread the filling out so it’s flat and evenly spread out, leaving about 1/2 inch of space to the edge.
Step 13: Fold and seal the dough
Fold the top half of the dough over the bottom half and align the seams together. Gently press down to seal around the edges. Be sure to push out any air pockets before completely sealing.
Step 14: Pleat the edges of the dumplings
Once sealed, pleat the edges of the dumplings. Repeat until all pockets are filled and pleated.
Step 15: Fry the dumplings
Fill up a pan with 1 inch of oil and heat over medium heat. To check if the oil is hot, stick a chopstick in the oil – if it starts to sizzle and bubble, the oil is hot and ready. Carefully place the chive pocket in the oil. Fry for 1 to 2 minutes then flip and fry for 1 to 2 minutes or until golden brown and crispy. Be sure to work in batches to prevent overcrowding the pan.
Step 16: Cool the dumplings
Transfer the chive and egg pockets to a wire rack to cool. Repeat until all chive pockets are cooked.
Step 17: Make the dipping sauce
Combine soy sauce, Chinese black vinegar, and chili oil. Mix together until well combined. Serve with the chive and egg pockets and enjoy!
Cooking Tips for Chive and Egg Pockets
To make the most delicious chive and egg pockets every time, here are some tips to keep in mind:
- The dough should be light and thin so do your best to roll out the dough as thin as possible!
- Avoid adding too much chive and egg filling to the dough otherwise, it’ll be hard to seal. They may also burst while frying if they’re too filled.
- These chive and egg pockets are best enjoyed hot. They’ll start losing their crispiness as they sit so enjoy them as soon as you can!
- Feel free to adjust the amount of chili oil added to the dipping sauce based on your spice level.
Frequently Asked Questions
Can I make these chive and egg pockets in advance?
Yes, absolutely! These chive and egg pockets can be made ahead of time and stored in the freezer for quick and easy meals. After assembling, arrange the chive and egg pockets on a lined sheet tray and transfer them to the freezer for a couple of hours. Once they’ve completely frozen, transfer them into a freezer-safe bag and they’ll last for up to three months in the freezer.
Can I use other herbs aside from Chinese chives?
Chinese chives, also known as garlic chives, are distinct in taste and traditionally used in this recipe however, you can definitely experiment with other herbs like scallions.
Aside from frying, is there an alternative way to cook these chive and egg pockets?
Yes! For a healthier option, you can either bake or air fry the chive and egg pockets. To bake in the oven, brush the pockets lightly with neutral oil then bake in a preheated 400F (205C) oven for 10 to 12 minutes or until golden brown. Keep in mind that they won’t come out as crispy compared to frying or air frying. For the air fryer method, air fry at 400F (205C) for 10 minutes or until golden brown and crispy. Make sure to spray with cooking oil spray and flip halfway through.
Can I store egg and chives pockets?
Chive and egg pockets are best enjoyed fresh however if you have leftovers, you can store them in an airtight container in the fridge for up to 3 days. Reheat with some oil in a pan over the stovetop or bake in a 350F (175C) oven for 5 to 10 minutes until the exterior is crispy. I don’t recommend microwaving them as they’ll turn soggy.
Looking for more easy & delicious appetizer recipes?
1. Kimchi Hot Dogs – this recipe is a fusion of an All-American classic hot dog with the flavors of kimchi chili. It’s spicy, tangy, and hearty, and perfect when you’re craving something unique, exciting, and downright delicious.
2. Corn Cheese Balls – this recipe turns the popular Korean corn cheese appetizer into fried corn cheese balls! They’re incredibly crunchy, cheesy, and the ultimate snack!
3. Kimchi Nachos – whether it’s game day, gatherings, or movie night, my kimchi nachos are guaranteed a crowd pleaser. The taste of kimchi pairs deliciously with the bold and familiar flavors of your classic nachos.
4. Curry Fish Balls – this Hong Kong street food classic is a delicious combo that makes a quick and satisfying snack. Soft and bouncy fish balls coupled with spicy and umami curry sauce will have you craving more.
5. Ramen Popcorn – instead of throwing away extra ramen flavor packets, add them to popcorn to turn them into a spicy and savory snack!
Chive and Egg Pockets
Ingredients
Dough
- 1 1/2 cups (220g) all-purpose flour
- 1 tsp salt
- 1/2 cup (120g) warm water
- 3 tbsp neutral oil divided, plus more for frying
Filling
- 8oz Chinese chives or garlic chives
- 3 eggs
- 1/2 tsp salt divided
- 2 tbsp dried shrimp
- 1/4 cup (1 oz) mung bean vermicelli noodles cooked according to package instructions and cut into 1/2 inch pieces, substitute with glass noodles
- 1 1/2 tbsp sesame oil
- 1 tbsp oyster sauce
- 1/4 tsp chicken bouillon powder
- 1/4 tsp white pepper
Dipping Sauce
- 1 tbsp soy sauce
- 1 tbsp Chinese black vinegar substitute with rice vinegar
- 1/2 tbsp chili oil
Instructions
- In a bowl, combine all-purpose flour and salt. Whisk until combined.
- Pour the warm water while stirring with a spatula or chopsticks until a shaggy dough forms. Add 1 tablespoon oil then knead until a dough forms, about 1 to 2 minutes.
- Cover with plastic wrap or a damp towel and allow the dough to rest for at least 30 minutes.
- While the dough is resting, start prepping the filling. Soak the dried shrimp in cold water to rehydrate for 10 to 15 minutes. Once rehydrated, finely chop then set aside.
- Next, chop the chives, about 1/4 inch thick, then transfer them to a large mixing bowl.
- In a non-stick pan, heat 1 tablespoon oil over medium heat. Once the oil is hot, add dried shrimp and cook for about 1 minute. Transfer to the bowl with chives.
- In a small mixing bowl, whisk together eggs and 1/4 tsp salt.
- In the same pan, add 1 tablespoon oil then pour in the eggs while continuously stirring with a spatula or chopsticks in a circular motion. Cook until the eggs are no longer runny. Transfer to the bowl with chives.
- In the bowl with chives, dried shrimp, and eggs, add the cooked vermicelli noodles*, sesame oil, oyster sauce, chicken bouillon powder, 1/4 teaspoon salt, and white pepper powder. Mix together until well combined. At this point, taste for seasoning and adjust according to your preferences. Cover and set the filling aside.*For the vermicelli noodles, cook it according to package instructions then strain and rinse under cold water. Cut into ¼ inch pieces.
- Take the rested dough and cut it into 6 equal pieces of dough (about 60 grams each). I recommend using a scale to weigh them out so they are accurate in size.
- Roll each piece of dough into a ball. Cover with plastic wrap and allow to rest for 15 minutes. After 15 minutes, sprinkle flour over the surface area and onto the rolling pin. Roll each dough ball out very thinly into a wide oval shape.
- Take about 4 to 5 tablespoons of the filling and place it in the bottom half of the dough. Spread the filling out so it's flat, leaving about 1/2 inch of space to the edge.
- Fold the top half of the dough over the bottom half and align the seams together. Gently press down to seal around the edges. Be sure to push out any air pockets before completely sealing.
- Once sealed, pleat the edges of the dumplings. Repeat until all pockets are filled and pleated.
- Fill up a pan with 1 inch of oil and heat over medium heat. To check if the oil is hot, stick a chopstick in the oil – if it starts to sizzle and bubble, the oil is hot and ready. Carefully place the chive pocket in the oil. Be sure to work in batches to prevent overcrowding the pan. Fry for 1 to 2 minutes then flip and fry for 1 to 2 minutes or until golden brown and crispy.
- Transfer to a wire rack to cool. Repeat until all chive pockets are cooked.
Dipping Sauce
- Combine soy sauce, Chinese black vinegar, and chili oil. Mix together until well combined. Serve with pockets and enjoy!