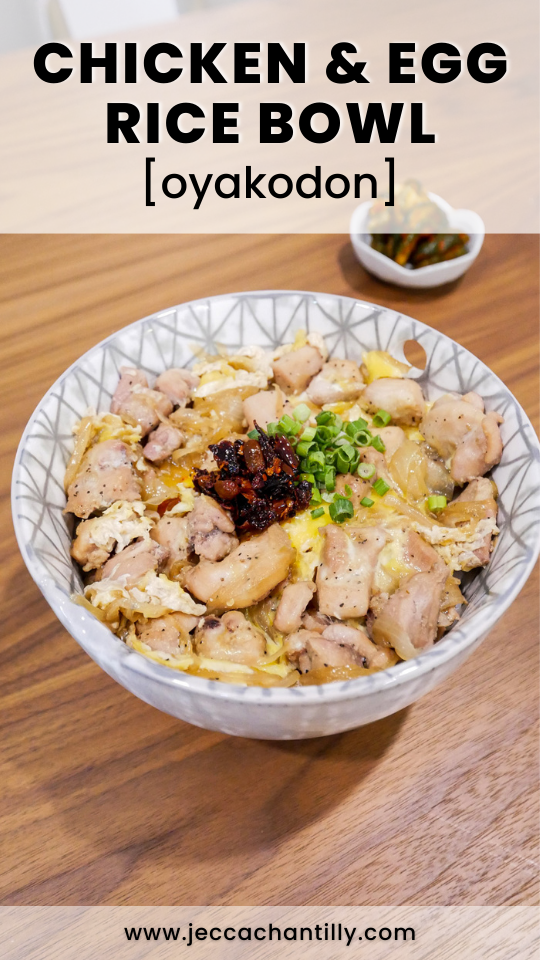
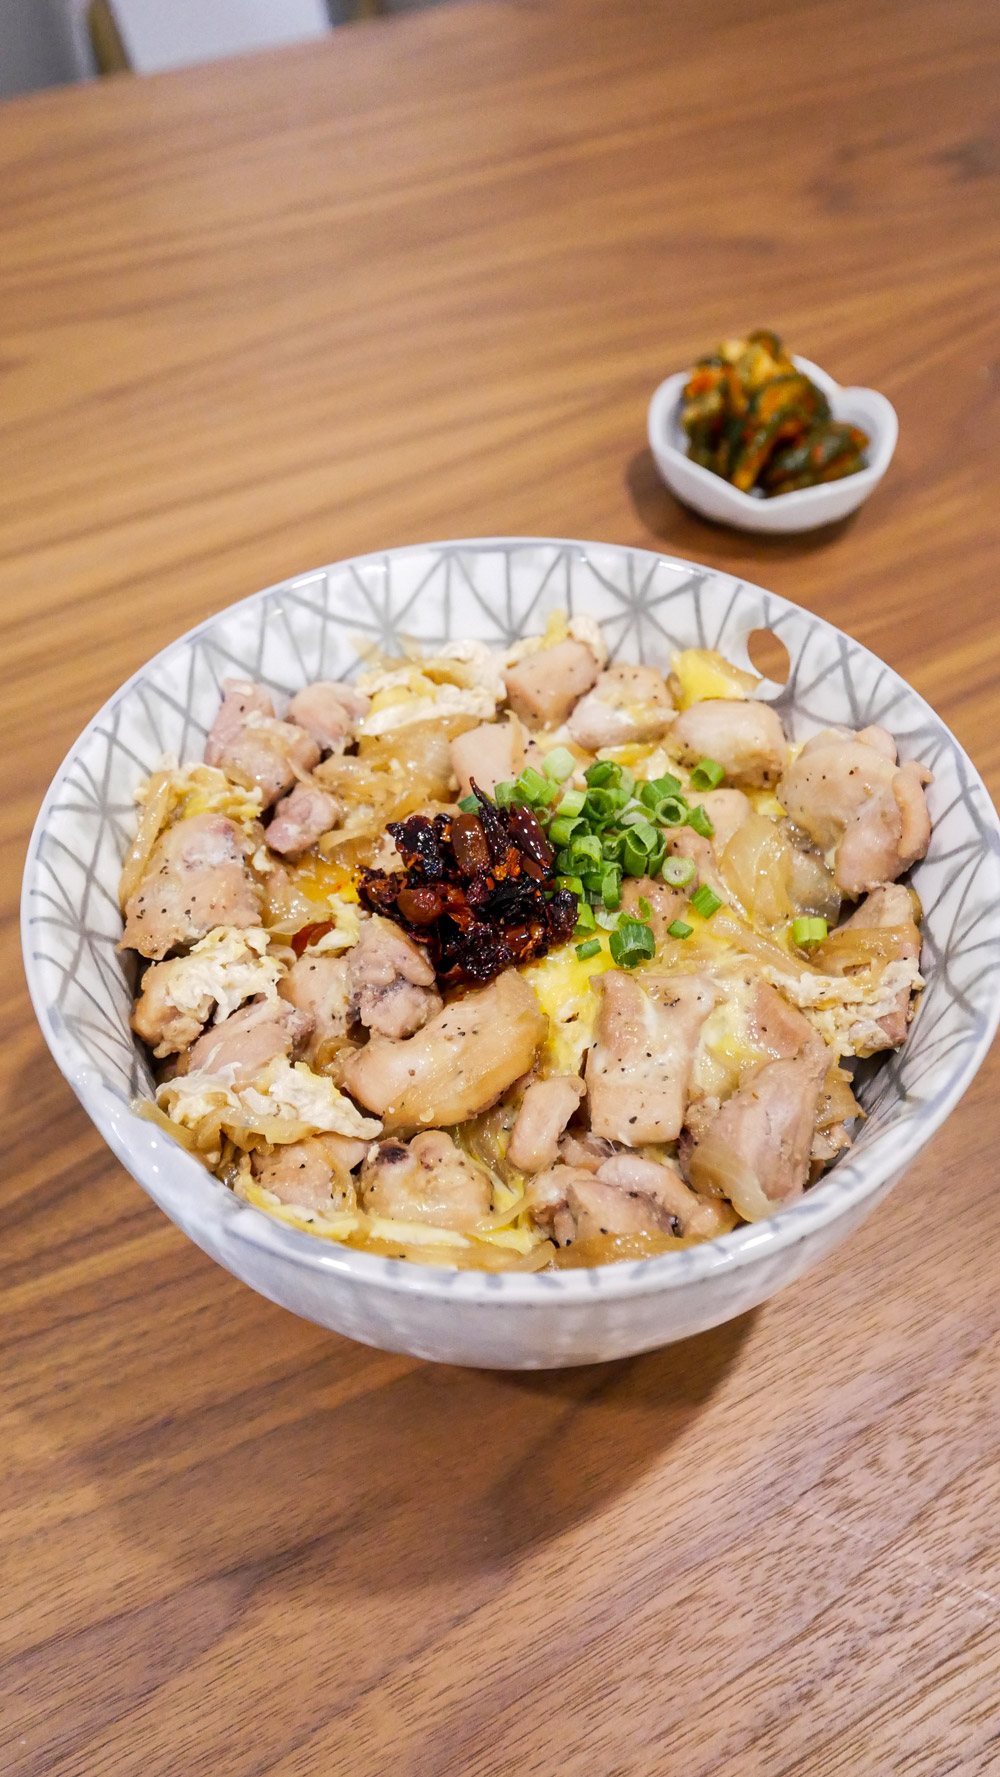
Sometimes a good rice bowl is all you need to cheer you up or get you through the day. This ‘oyakodon‘, or Japanese-style chicken and egg rice bowl, does the trick for me every time!
It’s comforting, delicious, and packed with so much flavor. I love mixing the rice, chicken, and egg with the dashi-based sauce. It’s so satisfying and hits all the right spots!
Why you’ll love this recipe
Everyone knows that a good oyakodon starts with a delicious dashi broth. The salty and umami flavors of dried kelp and dried bonito flakes make an excellent foundation for the sauce. The good thing about making dashi stock at home is you can adjust the taste according to your preference.
The addition of mirin, sake, soy sauce, and sugar to the sauce creates an explosion of sweet, savory, and tangy flavors. Paired with the chicken and egg, you have a heartwarming and filling meal that’s perfect for lunch or dinner.
How do I prepare Oyakodon?
Follow the steps below to prepare this delectable meal:
Step 1: Cook the rice
Start by cooking short-grain or medium-grain rice in a rice cooker or your preferred method of preparing rice.
Step 2: Prepare the dashi stock
In a pot, combine water and dried kelp. Simmer on low for 10 minutes, then remove the kelp from the pot.
Step 3: Add the dried bonito flakes
Add the dried bonito flakes. Bring to a boil, then reduce the heat to simmer for 30 seconds. Turn off the heat, then set the broth aside for 10 minutes.
Step 4: Strain the dashi broth
Strain the dashi broth through a fine-mesh sieve. This should yield about 1 cup of broth.
Step 5: Mind the ingredient measurements
While this recipe calls for 2 servings, the oyakodon should be prepared individually for each serving. At this point, the measurements listed in the steps are for one serving or one bowl.
Step 6: Cook the rest of the ingredients
Heat a pan over medium heat. Then, add the sliced onions, 1/2 cup dashi broth, 1 1/2 tablespoons soy sauce, 1 tablespoon mirin, 1 tablespoon sake, 1/2 tablespoon sugar, and 1 portion of chicken thigh.
Step 7: Simmer
Let the mixture simmer for 5 minutes, then flip the chicken and cook until it’s no longer pink – which should take about 2 to 3 minutes.
Step 8: Prepare the egg
While the chicken is cooking, whisk an egg in a small bowl. Drizzle the egg over the chicken, then cover with a lid. Cook until the eggs are slightly set.
Step 9: Garnish and serve first serving
Serve over a bowl of rice and garnish with scallions and/or chili oil.
Step 10: Prepare the second serving
Repeat steps 6 through 9 for the second serving. Serve and enjoy!
Cooking Tips for Oyakodon
To help make the process of preparing oyakodon easier, here are a few cooking tips that are good to remember:
- Since the chicken thighs are boneless, they won’t take long to cook. You can check their doneness by pressing them with a fork. Once the fork goes through easily and their color turns white, you’ll know they’re ready.
- Making oyakodon one serving at a time is easier since you can easily slide the chicken and egg on top of the rice flawlessly. Compared to making two servings at once, you’ll need to divide the chicken and egg in half, breaking the layers.
Ingredients & Substitutions
Chicken thighs: chicken thighs are the main highlight of this dish. I’m using skinless and boneless chicken thighs for this recipe, but you can also use chicken filets.
Onion: onion adds a distinct umami flavor and aroma to the oyakodon. I’m using white onion, but you can also use yellow or red onion.
Eggs: oyakodon won’t be complete without the eggs. Feel free to add more if you want the eggs to be richer and fluffier.
Dashi broth: dashi broth is the base of the sauce. You can make it at home just like in the recipe, or use dashi powder if you prefer a quicker version.
Soy sauce: soy sauce adds a salty and umami flavor to the sauce.
Mirin: mirin provides a sweet and tangy taste that complements the flavors of the sauce. As a substitute, you can use dry sherry or sweet marsala wine.
Sake: sake adds a subtle sweet and acidic taste to the sauce. You can use Shao Xing cooking wine, dry sherry, or rice wine vinegar as a substitute.
Sugar: the sweetness of the sugar rounds out the umami and salty flavors of the sauce. You can use white or brown sugar for this recipe.
Rice: rice makes this dish filling. Feel free to use short or medium-grain rice for this dish, such as arborio valencia rice.
Dried kelp: dried kelp is an essential ingredient in dashi stock and adds an umami and salty flavor. In a pinch, you can substitute it with dried kombu granules or kombu tea.
Dried bonito flakes: dried bonito flakes are also essential for making dashi stock and add an umami flavor. In a pinch, you can double the amount of dried kelp as a substitute or use iriko (baby anchovies) instead.
Water: water is needed for making dashi stock. Feel free to adjust according to the volume of stock you’re making.
Chopped scallions: chopped scallions enhance the flavors of the onion and add a nice touch of color as a garnish. In a pinch, you can substitute it with leeks, spring onions, or chives.
Chili oil: adding chili oil is completely optional, but it adds a nice spice to the dish. Feel free to use your preferred brand of chili oil, or try making my Homemade Chili Oil recipe in advance.
Ingredient additions/variations
If you want to level up your oyakodon, here are a few ingredients you can play around to add bursts of flavors to your meal:
1. Carrots – if you want to sneak in some veggies to your oyakodon, carrots would be an excellent pick. They add a hint of sweetness and are easy to cook. Make sure to dice them and toss them while simmering the chicken thighs.
2. Pea shoots – if you prefer leafy greens over carrots, pea shoots would be a lovely addition to oyakodon. You can steam them and serve them on top or turn them into a side dish, like my Pea Shoots with Garlic recipe.
3. Firm tofu – add more texture and protein to your oyakodon with firm tofu. Dice and fry them until golden brown before tossing them into your oyakodon.
Frequently Asked Questions
What does dried kelp taste like?
Dried kelp or kombu tastes a combination of umami and salty flavors. It’s often rehydrated in water to coax out its natural flavors. Aside from dashi stock, it’s also a prominent ingredient in Japanese cuisine since it can be added to soups, noodles, seafood, or stir-fry dishes.
What are bonito flakes made out of?
Bonito flakes or katsuobushi are made from skipjack tuna flakes that are smoked, fermented, and sun-dried. It has an umami and fishy taste and is often incorporated in several dishes in Japanese cuisine. Aside from making dashi stock, you can use bonito flakes as toppings, garnish, or seasoning for eggs, rice, tofu, or noodles.
Can you store oyakodon?
Yes, you can store leftover oyakodon in the fridge. Place it in an airtight container so it stays fresh for 2 to 3 days. You can reheat it in the microwave or stovetop until warm. Be careful not to leave it in the heat for too long to avoid overcooking the chicken. Otherwise, it will turn dry and rubbery.
Looking for more easy & delicious Japanese-inspired recipes?
1. Cold Soba Noodles – if you‘re looking for a refreshing deal to cool down from the heat, this recipe is a must-try! The nutty flavors of the soba noodles, married with the savory dipping mentsuyu sauce, make it an irresistible treat for any season.
2. Curry Udon Noodles – for a no-frills, easy, and delicious weeknight meal, this recipe is hard to beat. The udon noodles are smothered in a rich and velvety curry that’s bursting with flavor.
3. Miso Banana Bread – level up your banana bread with a savory twist. Miso provides a delightful umami flavor that takes sweet and moist banana bread to new heights.
4. Pan Seared Miso Salmon – don’t be fooled by the simplicity of this recipe because it’s jam-packed with flavor. The combination of juicy and tender salmon filet smothered with the flavors of the mushroom and miso glaze will make your partner fall head-over-heels in love with you again.
5. Japanese Egg Sandwich (Tamago Sando) – you no longer have to go to the convenience store to get a bite out of this popular Japanese sandwich when you can easily recreate it at home with this recipe. The results are rich and creamy sandwiches, perfect for a quick and easy meal for lunch, picnics, or hikes!
Oyakodon – Japanese Chicken & Egg Rice Bowl
Ingredients
- 2 chicken thighs skinless + boneless
- 1/2 cup onion thinly sliced
- 2 eggs
- 1 cup dashi broth
- 3 tbsp soy sauce
- 2 tbsp mirin
- 2 tbsp sake
- 1 tbsp sugar
- 2 cups rice cooked
Dashi Broth (Makes about 1 cup)
- 1 (3×3) piece dried kelp
- 1/2 cup dried bonito flakes katsuobushi
- 2 1/2 cups water
Garnish
- chopped scallions optional
- chili oil optional
Instructions
- Start by cooking short-grain or medium-grain rice in a rice cooker or your preferred method of preparing rice.
- In a pot, combine water and dried kelp. Simmer on low for 10 minutes then remove the kelp from the pot.
- Add the dried bonito flakes. Bring to a boil then reduce the heat to simmer for 30 seconds. Turn off the heat then set aside for 10 minutes.
- Strain the dashi broth through a fine-mesh sieve. This yields about 1 cup of broth.
- While this recipe calls for 2 servings, the oyakodon should be prepared individually for each serving. At this point, the measurements listed in the steps is for one serving or one bowl.
- Heat a pan over medium heat. Add the sliced onions, 1/2 cup dashi broth, 1 1/2 tablespoon soy sauce, 1 tablespoon mirin, 1 tablespoon sake, 1/2 tablespoon sugar, and 1 portion of chicken thigh.
- Simmer for 5 minutes then flip the chicken and cook until it is no longer pink, about 2 to 3 minutes.
- While the chicken is cooking, whisk an egg in a small bowl. Drizzle the egg over the chicken then cover with a lid. Cook until the eggs are slightly set.
- Serve over a bowl of rice and garnish with scallions and/or chili oil.
- Repeat steps 6 through 9 for the second serving.
Pin & save this recipe for later!