The first time I ever made these French Tuiles was back when I was in high school in culinary class. I remember how much I loved eating these in between classes and they’re still one of my favorite things to bake to this day! I make these quite frequently for my friends and family and they’re one of my most highly requested recipes.
I like to call these ‘sweet pringles’ because their curvey oval shape reminds me of the popular Pringles snack. While shaping them is optional, I like to do this extra step because I think it makes them look great for presentation and *aesthetics*. But whether they’re shaped or not, they’ll still taste good so it won’t really matter what they’ll look like in the end!
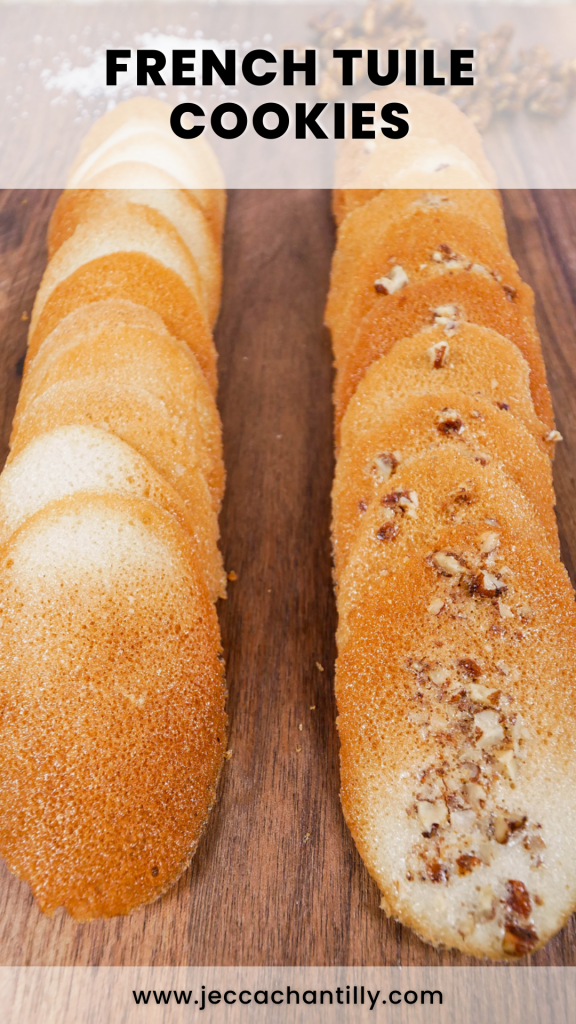
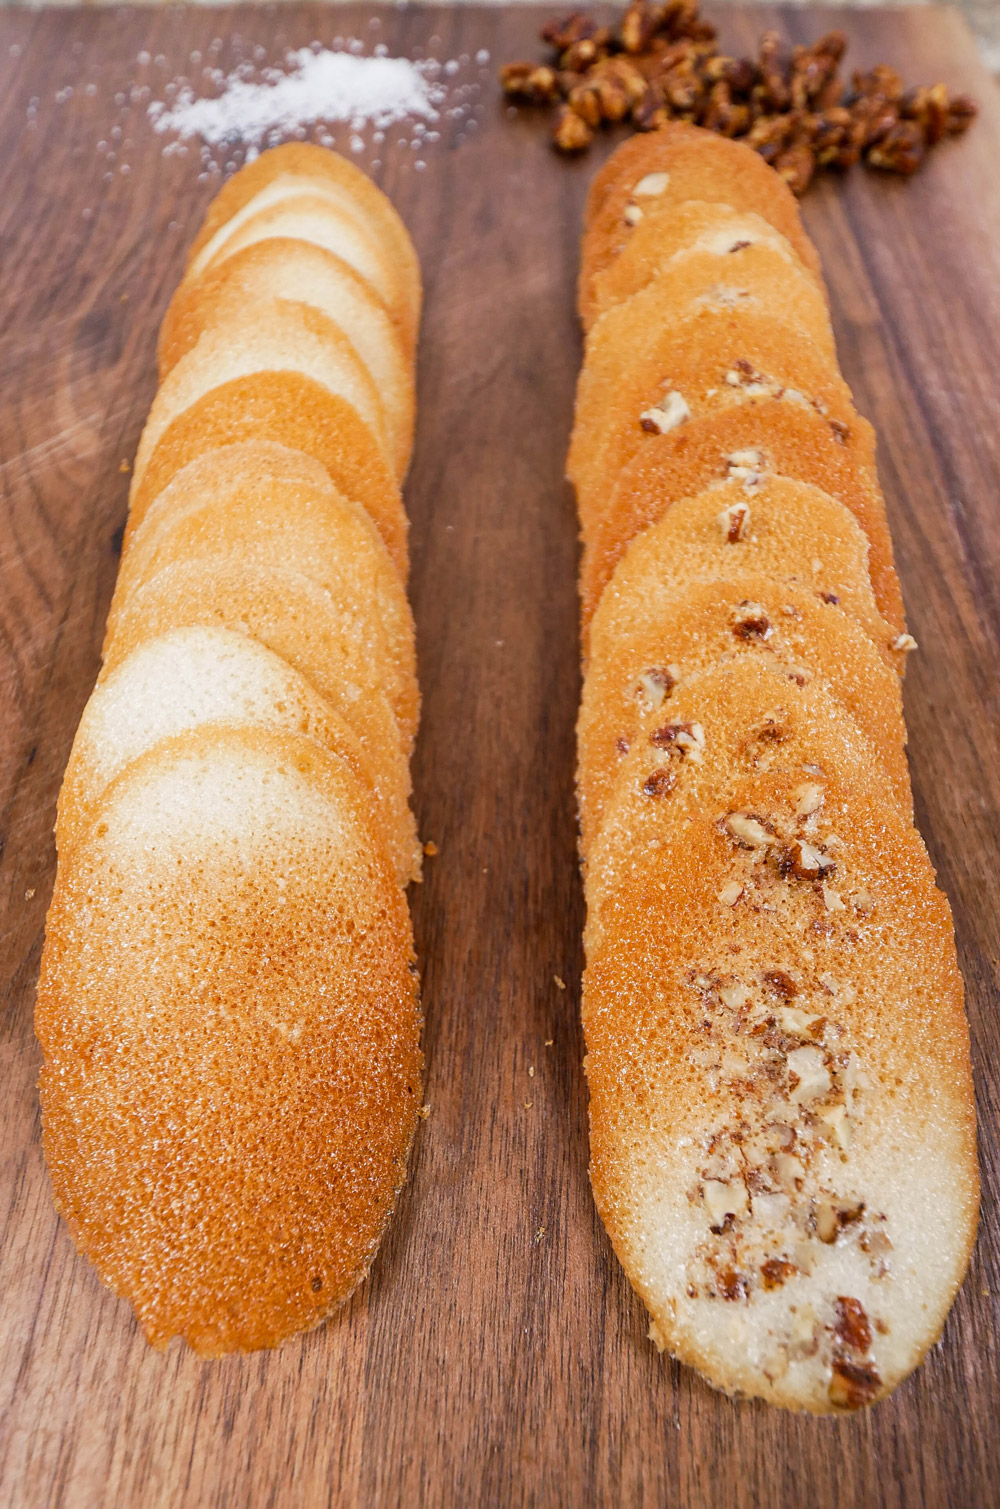
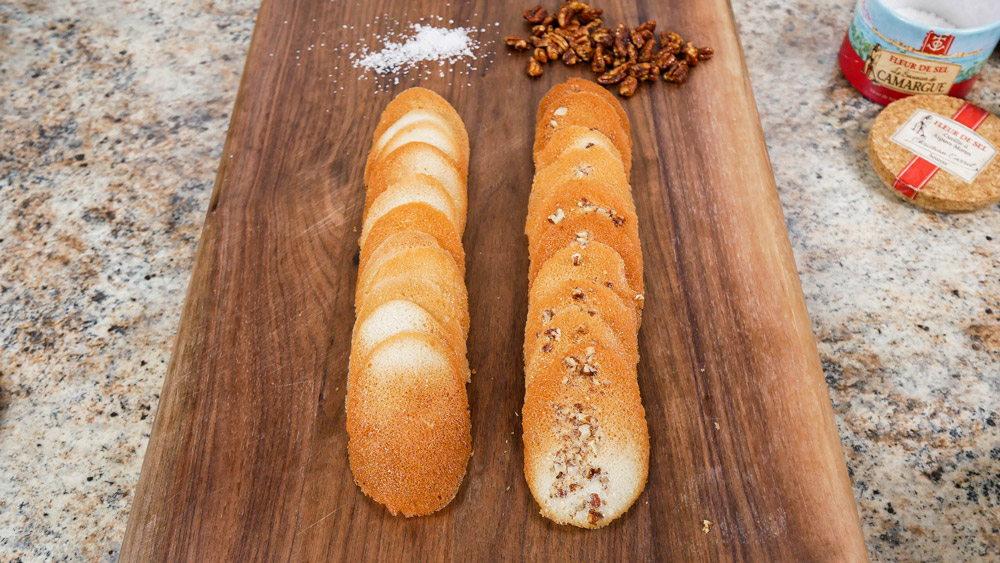
My original recipe used toasted almonds but since I didn’t have any in my pantry, I decided to use my Spiced Maple Glazed Pecans instead. I also topped half of the cookie batch with some flakey salt and the sweet and salty combo was to die for. Trust me, once you take a bite you’ll be RUNNING back for more!
Why you’ll love this recipe
If you’re in the mood for cookies and want to try something different, you’ll want to give this recipe a try. Most of the ingredients should already be in your pantry, otherwise, they can be easily accessible in your local market. These tuiles take a little TLC but I promise it’s worth it!
Although shaping them is optional, I highly recommend giving them a shot! The most important thing is to move fast because the tuiles will begin to harden as soon as they come out of the oven.
I prefer to top the tuiles with a dash of flakey salt or flavored chopped nuts, but if you want to go the extra mile you can also experiment with your own toppings and combinations. With a few teaspoons of cocoa powder, you can even give them a rich chocolate flavor.
What does tuile mean?
Before I show you how to make this recipe, let’s first dive into what the term ‘tuile’ means. In French, it literally translates to ‘tiles’ because the shape of the cookies is reminiscent of the roof tiles used in provincial French houses. Traditionalists believe that shaping the cookies is essential for the recipe, to the point where France has molds available just for tuiles! It’s difficult to pinpoint the actual history of the cookies, but it’s believed that they originated in the 17th century.
Despite its elegant name, French Tuiles are actually easy to make. But don’t get disheartened if your cookies don’t turn out perfect on the first try because they will still taste delicious! Considering how simple and easy the ingredients are to come by, you’ll be able to make this any time!
How do I prepare French Tuile Cookies?
French tuiles may not be your average cookie recipe – it’s unique and possibly, even better. To make these sugary delights, follow the steps below:
Step 1: Prepare the oven
Preheat the oven to 400°F (200°C) while you prepare the ingredients.
Step 2: Prepare the batter
Place the butter in a heatproof bowl and microwave until it’s melted.
In a separate bowl combine the sugar, egg whites, and vanilla. Make sure to whisk well and mix them together. Next, stir in the flour and melted butter and whisk until smooth.
Step 3: Assemble the cookies
On a lined sheet tray or preferably on a silicone baking mat, pour a teaspoon of batter at a time making sure there’s at least 1/2 inch of space between each cookie. With the back of the spoon, spread the batter thinly into an oval shape. You can also check the video below to see how thin they should be.
Then, sprinkle a generous amount of chopped nuts or flakey salt on top of each tuile.
Step 4: Bake
Once you’re done assembling the cookies, place the sheet tray in the oven and let it bake for 6 to 10 minutes or until the edges turn brown and crispy. Don’t forget to turn the sheet halfway through to ensure each tuile cooks evenly.
Step 5: Shape the tuiles
This step is optional, but if you want to shape the tuiles you’ll need to work fast since they’re only malleable when hot and harden really fast. To shape them, use an offset spatula to lift and transfer them onto a rolling pin.
If you prefer to keep them flat, just wait for them to cool completely and they will come right off of the sheet tray.
Step 6: Eat and store
Wait for the cookies to cool and set before you take a bite. Store the rest of the tuiles in an airtight container and they’ll stay fresh for up to 4 days!
Cooking tips for French Tuile Cookies
These French Tuiles only take a few steps to make, but since they have an unconventional method for baking, these tips will help you get the perfect results every time:
- Remember to line your sheet trays with wax paper or a silicone baking mat before pouring the batter or else the tuiles will stick when baked.
- Don’t be afraid to spread the batter out really thin! In case you want them to be thicker, adjust the baking time so it bakes all the way through.
- If you don’t have a rolling pin for shaping the tuiles, you can also use a bottle with a smooth surface, like a wine bottle!
- Keep the batter in the fridge when not in use. This will stiffen up the batter, making it easier to shape.
- Allow the baking tray to slightly cool in between batches. This will prevent the batter from separating and will make shaping easier.
Ingredient Substitutions
Butter: butter will always be superior in any baked good, but if it’s unavailable you can also replace it with margarine.
Sugar: I like to use white sugar for this recipe, but if you don’t mind the tuiles having a darker color you can also substitute it with brown sugar.
All-purpose flour: I recommend sticking with all-purpose flour for this recipe so they retain its snap and crispness.
Nuts: sliced almonds are traditionally added to tuiles, but if they’re not available you can use your choice of nuts. For extra flavor, give my Honey Glazed Walnuts recipe a try!
Frequently Asked Questions
How do you soften tuile cookies?
If you’re in the middle of shaping these delicate cookies and realized they’ve gone cold, you can make them malleable again by popping them back inside the oven for 10 to 15 seconds or until they’re warm. Remember not to leave them in there for too long otherwise, they’ll start to burn! If you’re making a big batch, it’s wise to keep the oven on while you’re still shaping in case you need to reheat the tuiles.
Are there other ways to shape tuile cookies?
Yes, there are other ways for shaping tuile cookies! Using a rolling pin is how I usually like to shape the tuiles, but another way is to roll them like a small cigar. You can use the handle of a wooden spoon as a guide or use your fingers to delicately roll them. I’ve also seen other bakers place them in between the bottom of a cupcake baking tray to create a U-shape that resembles taco shells.
But the best one I’ve seen is where they drape the tuiles on top of small jars or containers to form them into tuile cups. This way, you can then fill them with ice cream or sweetened whipped cream for a lavish dessert!
How do you store French Tuile Cookies?
French Tuiles are always served best when they’re fresh from the oven. But if you have extras, make sure to store them in an airtight container at room temperature and they’ll stay fresh for up to 4 days. The tuiles will lose their crispness if you expose them to air or leave them uneaten for too long, so make sure to eat them quick or store them properly. I have to warn you though – once you take a bite, I’m pretty sure there won’t be any leftovers!
What beverages pair well with French Tuile Cookies?
These cookies are already good on their own, but if you want to make your snack even more delightful, you can pair them with a refreshing beverage of your choice. Here are some of my favorite drink recipes that you can enjoy with these delectable tuiles!
1. Coffee – for my caffeine junkies out there, a meal wouldn’t be complete without a cup of joe. The tuiles will taste great whether you pair them with a hot or iced cup of coffee.
2. Tea – if you’re not into coffee, you can always pair the cookies with your favorite tea of choice. Chec out my Homemade Matcha Latte recipe!
3. Milk – milk and cookies are a tried and tested combo, but if you want to make it more interesting, you can also try my Korean Banana Milk recipe here.
4. Smoothie – for a nourishing summer refresher, I recommend trying these cookies with my Mango Pineapple Spinach Smoothie recipe.
5. Shake – for a nutritious and filling snack, try pairing the tuile with my Misugaru Shake recipe. You can drink it hot or cold, or blend it with ice!
Looking for more dessert recipes? Here are some of my all-time favorites!
- Hong Kong Egg Waffle with Ice Cream
- Mango Pancake
- Easy Banana Pudding
- Corn Ice Cream Recipe
- Mango Mochi
- Sweet & Salty Crispy Corn
French Tuile Cookies
Ingredients
- 3 tbsp (45g) butter
- 1/2 cup less 2 tsp (100g) sugar
- 2 egg whites
- 1/4 tsp vanilla extract
- 3 tbsp + 1 tsp (30g) all-purpose flour
- 1/2 cup chopped nuts optional
- pinch of flakey salt
Instructions
- Preheat oven to 400 degrees F / 200 degrees C
- Place the butter in a heat proof bowl and microwave until melted.
- In a bowl, combine sugar, egg whites, vanilla and mix with whisk together.
- Stir in the flour with melted butter and whisk until smooth
- On a lined sheet tray, drop a teaspoon of batter at a time. Using the back of a spoon, spread the batter out thinly. The batter should be so thin you can see the parchment or lining.
- Sprinkle chopped nuts or a pinch of flakey salt on top of each tuile.
- Bake for 6-10 minutes or until edges are browned, making sure to turn the sheet tray halfway through.
- The tuiles will be very malleable after it comes out of the oven and will harden fairly quickly. To shape the tuiles, use an offset spatula to lift and transfer the tuiles from the baking tray immediately after coming out of the oven onto a rolling pin. If you prefer to keep them flat and straight, wait for them to cool completely and they will come right off the sheet tray.
- Store in an air tight container for up to 4 days.
Notes
- Shaping the tuiles is optional. They’ll taste just as good so it doesn’t really matter what they look like!
Pin & save this recipe for later!