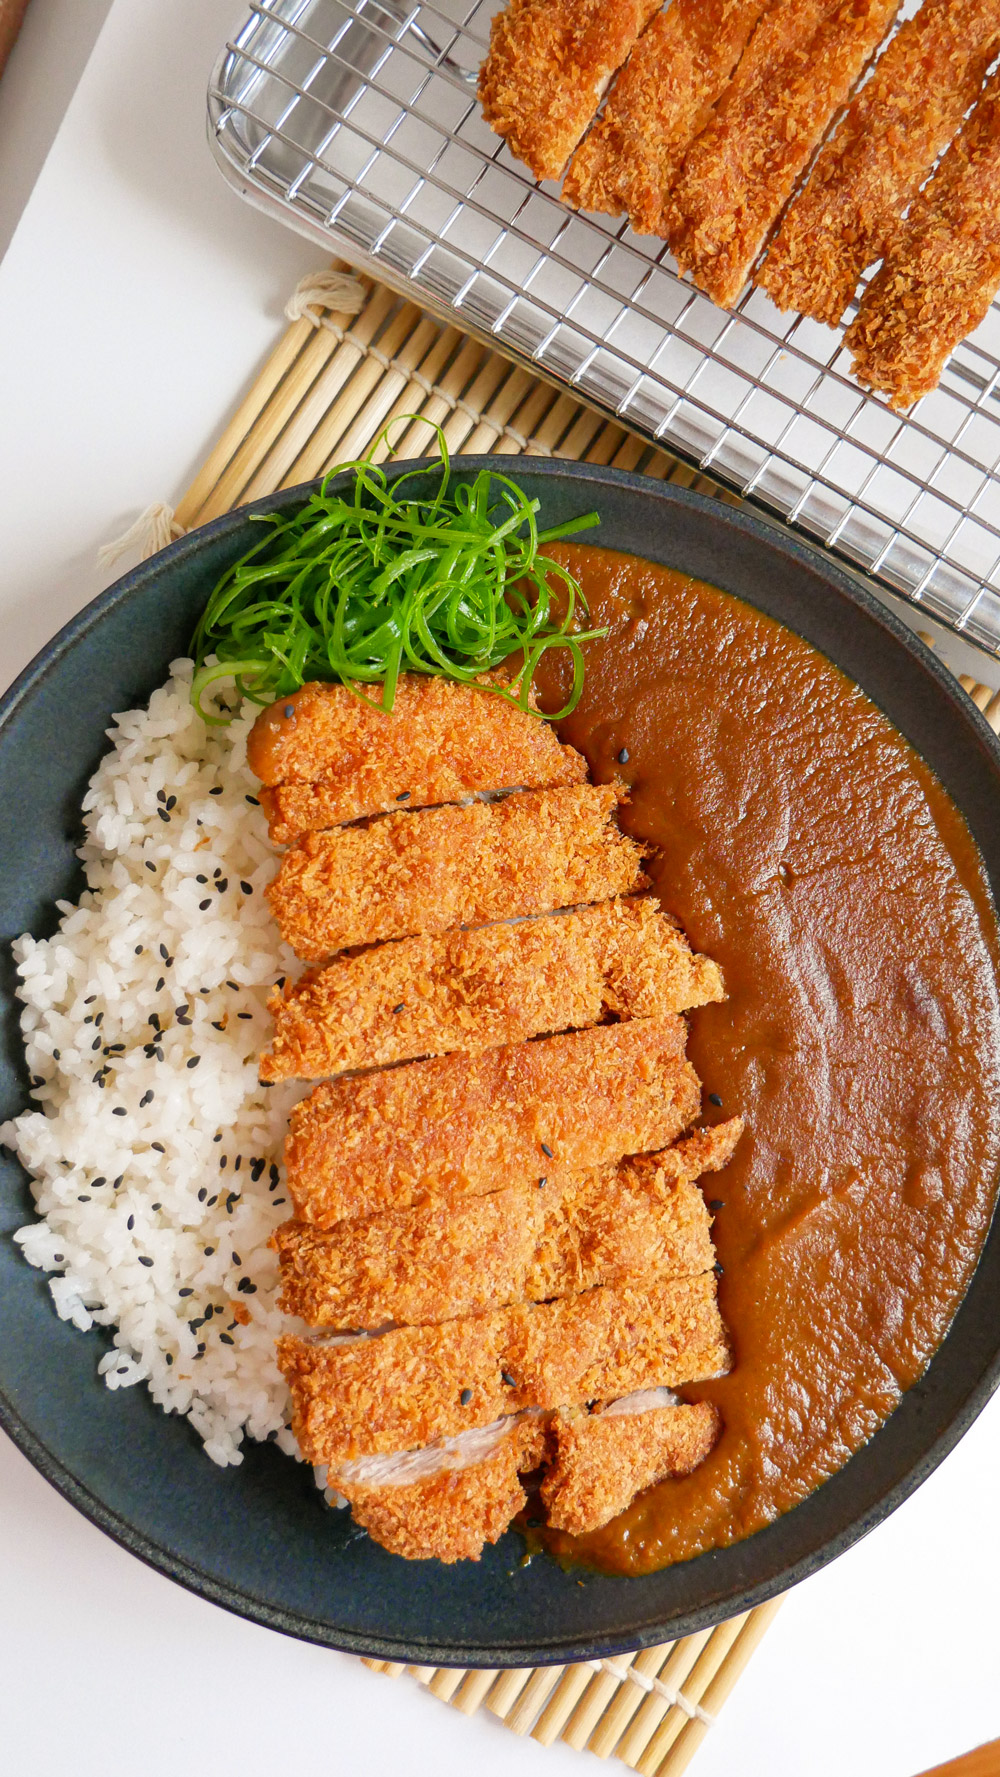
If you’re a fried chicken lover or a fan of Japanese cuisine, this crispy and juicy chicken katsu recipe will surely satisfy you! The combination of the beautiful golden brown exterior coupled with the tender and juicy interior makes this incredibly irresistible. You can serve it with a simple bowl of rice, on top of a plate of curry, or with a cold and refreshing salad.
Katsu, or “cutlet” in English, is a Japanese dish made by breading and then deep frying meat or vegetables until golden brown and crispy. The most popular kind is tonkatsu which is fried pork shoulder (ton means pork). Alternatively, you can also find or make zucchini katsu or eggplant katsu.
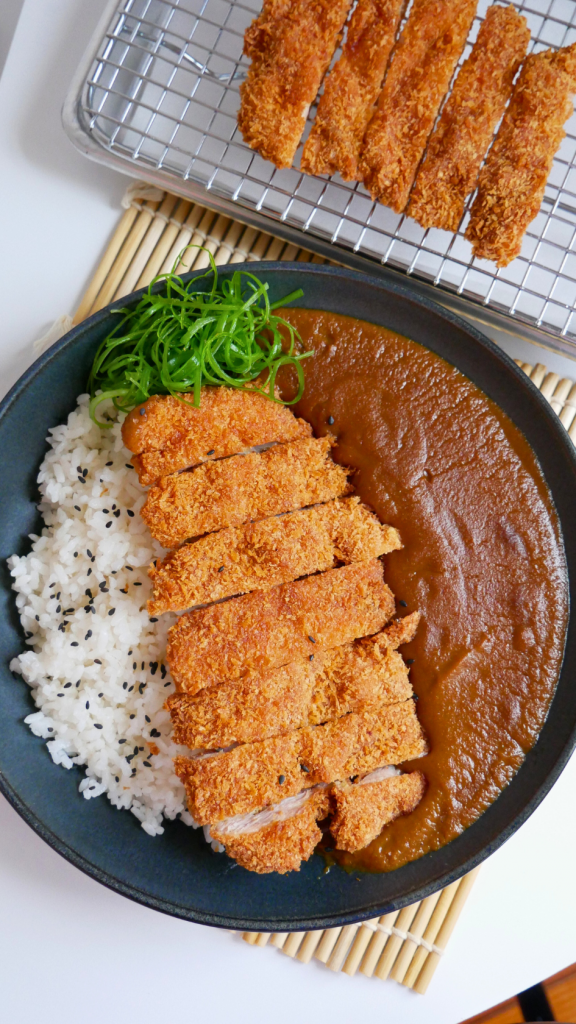
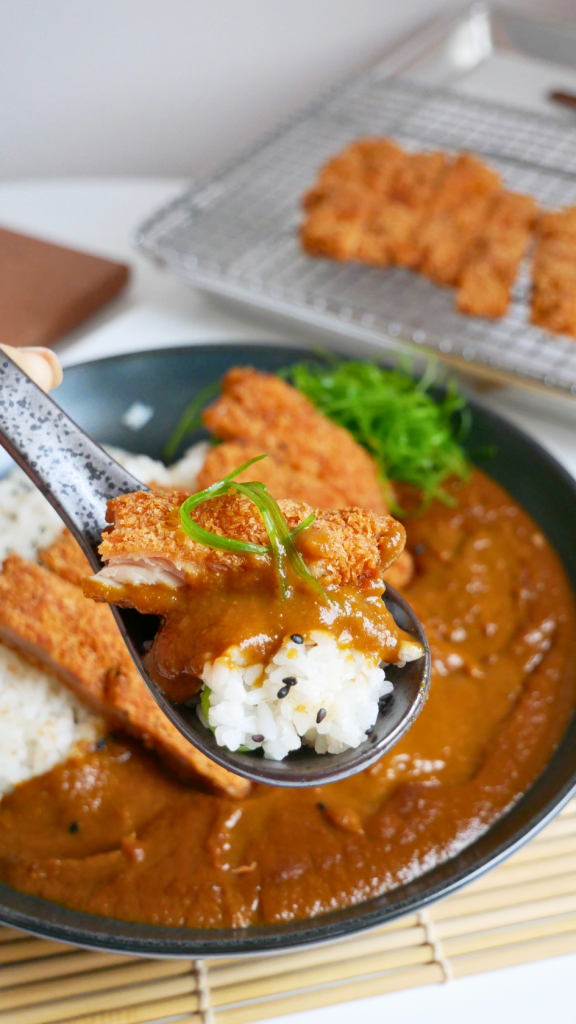
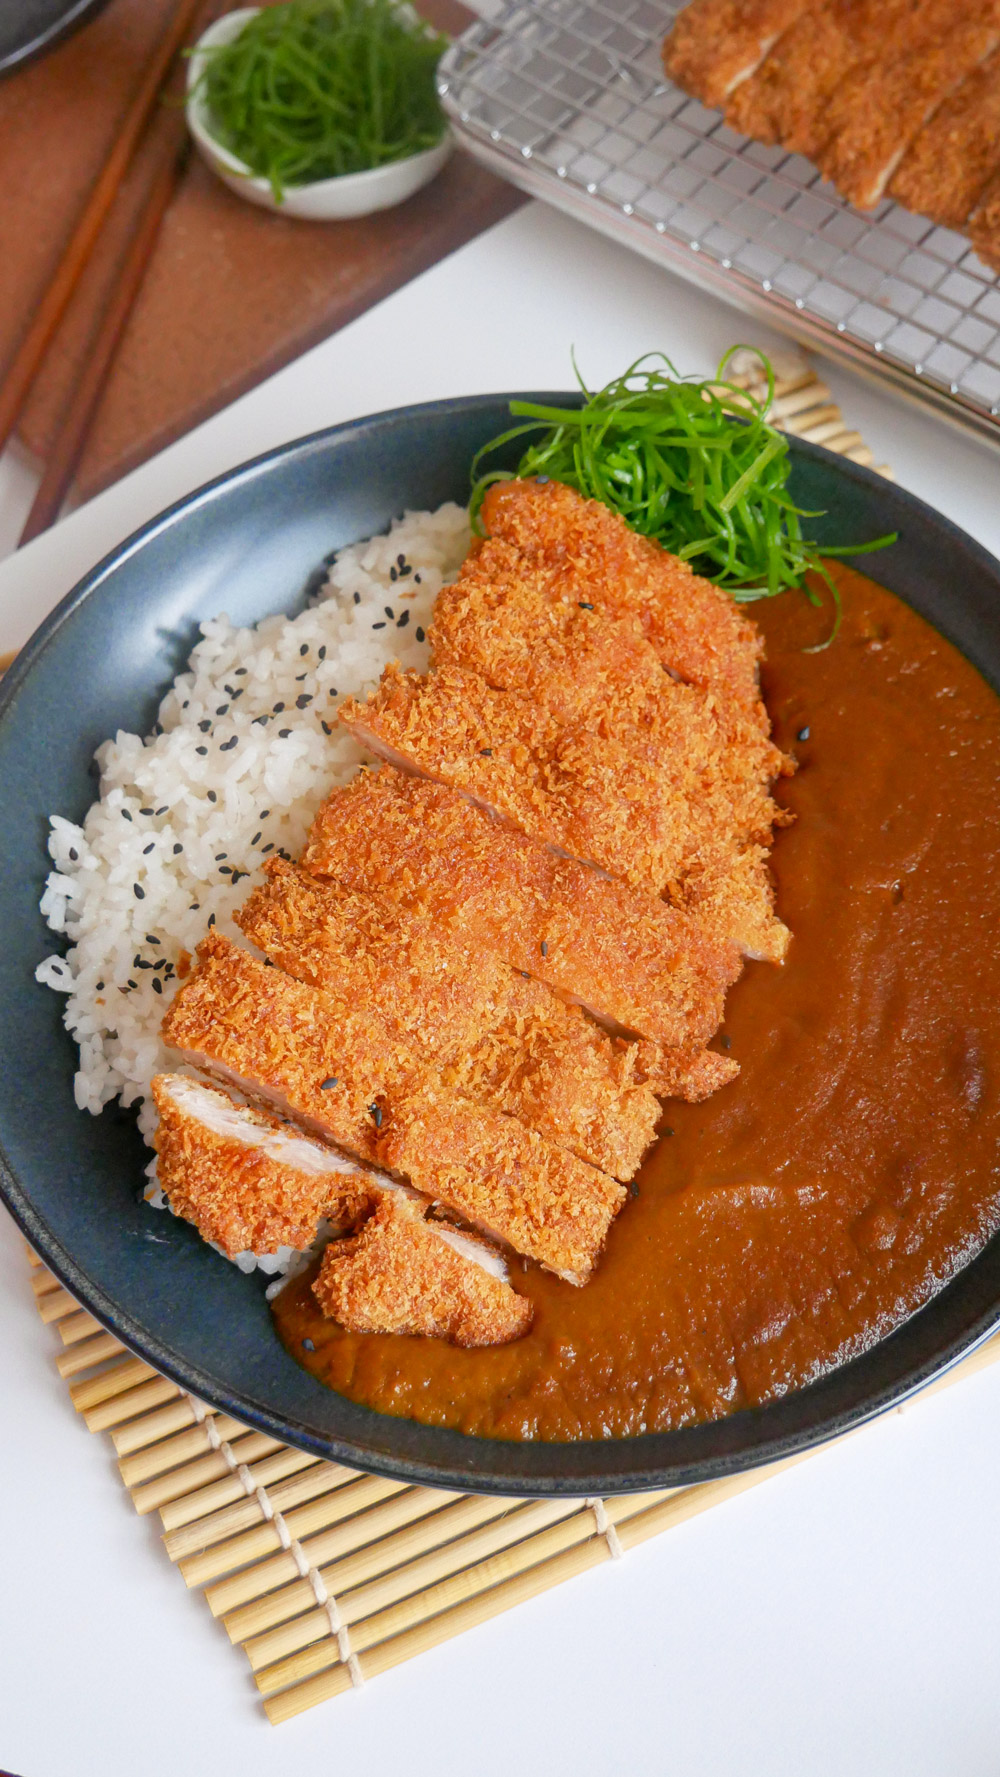
While it is most commonly served with Bulldog tonkatsu sauce, I don’t know about you, but my absolute favorite way to enjoy it is with rice and curry! I even made my own version of the Coco Ichibanya Curry — the perfect pairing for this yummy chicken katsu in my opinion.
Why you’ll love this recipe
This easy chicken katsu is perfect for when you are craving the comfort of crispy fried fast food but want to stay at home. You will need only a handful of ingredients and it’s ready in under 30 minutes!
Another thing is that in this recipe, I used chicken thighs which are fattier and more flavorful than chicken breast. Because of its higher fat content, it stays moist and juicy and doesn’t easily dry out throughout the cooking.
This crispy and juicy chicken katsu is sure to be a hit for both kids and adults. Aside from curry and tonkatsu sauce, you can play it up by pairing it with other dipping sauces like sriracha mayo or catsup. You can also serve it with shredded cabbage tossed in creamy sesame dressing as the perfect side dish to balance its richness.
Easy Chicken Katsu Ingredients & Substitutions
Chicken thighs: I opted to use chicken thighs because it is the most flavorful cut of chicken. Boneless and skinless so that it’s lean and easy to eat. But you can also use chicken breast. Keep an eye though as it dries up quite quickly.
All-purpose flour: For dredging. It’s the first layer of the breading process. It dries up the surface of the chicken so that the eggs have something to stick to. You can easily substitute it with cornstarch, potato starch, or almond flour if you prefer gluten-free.
Eggs: Now we see a mother and daughter tandem?! Eggs will act as glue for the panko breadcrumbs to stick onto. Use the freshest eggs you can find. To test the eggs’ freshness, drop them in a tall glass filled with cold tap water. If it sinks, it is fresh.
Panko breadcrumbs: If it’s a Japanese recipe, it has to be Panko! Panko breadcrumbs are made out of crustless white bread. They have bigger and drier flakes than regular breadcrumbs. Since they are dry, they make ultra-crispy outer breading without absorbing too much oil. If you don’t have them at hand, you can do it yourself by running stale crustless bread through the food processor till it’s medium coarse.
Salt: The only seasoning you need to bring out the natural flavor of the chicken.
Neutral oil: Some examples of neutral oil for frying are peanut oil, canola oil, vegetable oil, and corn oil. You want to use a flavorless oil so as to not alter the flavor of the final dish. In addition, neutral oils usually have a high smoke point, meaning it doesn’t get easily burnt.
How to Prepare Easy Chicken Katsu
Step 1: Prepare the chicken
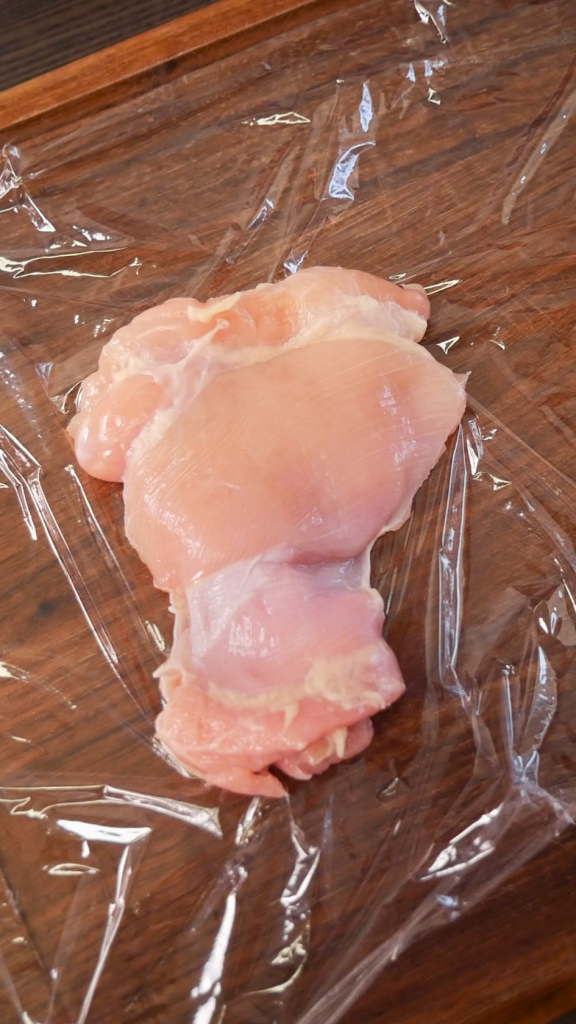
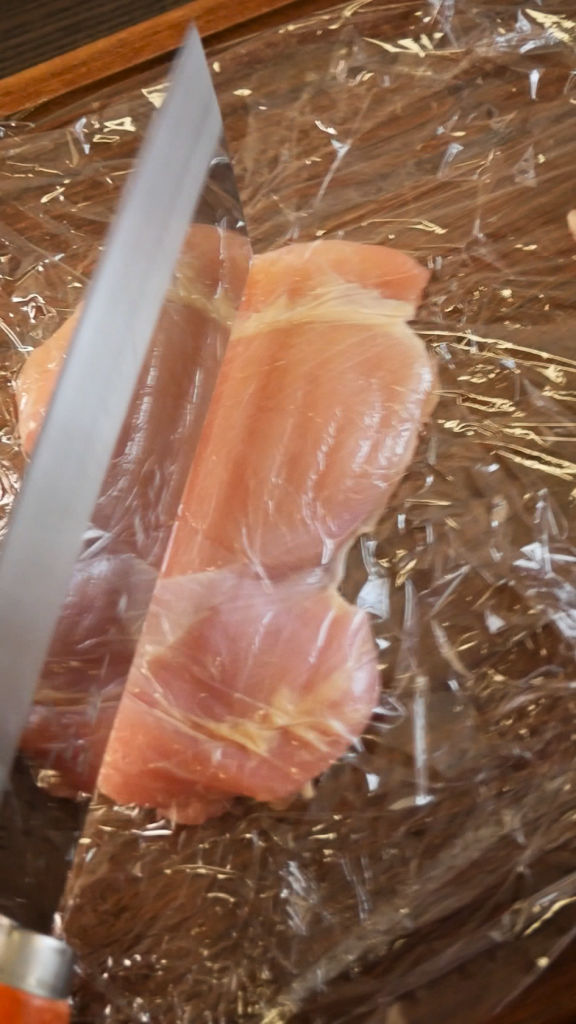
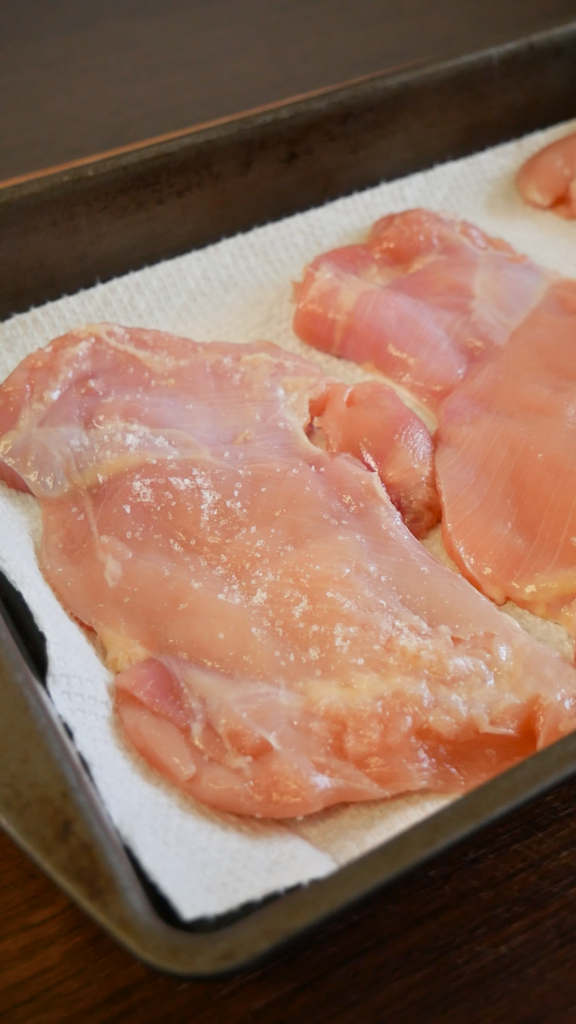
Place the chicken thighs in between two pieces of plastic wrap. Using a meat mallet or the back of your knife, pound the chicken thighs to 1/4 – 1/2 inch thick. Season both sides of the chicken thighs with 1/2 teaspoon of salt.
Step 2: Heat the oil
In a heavy-duty pot, heat neutral oil to 365F (185C).
Step 3: Set up the breading station

While the oil is heating up, prepare the dredge and breading station.
Step 4: Prepare the dredge
On a shallow plate, combine all-purpose flour and 1/4 teaspoon salt. Whisk to mix well.
Step 5: Prepare the wet batter
In a separate shallow plate, crack 2 eggs. Whisk until homogenized.
Step 6: Prepare the breading
In another shallow plate, combine panko breadcrumbs and 1/4 teaspoon salt.
Step 7: Bread the chicken
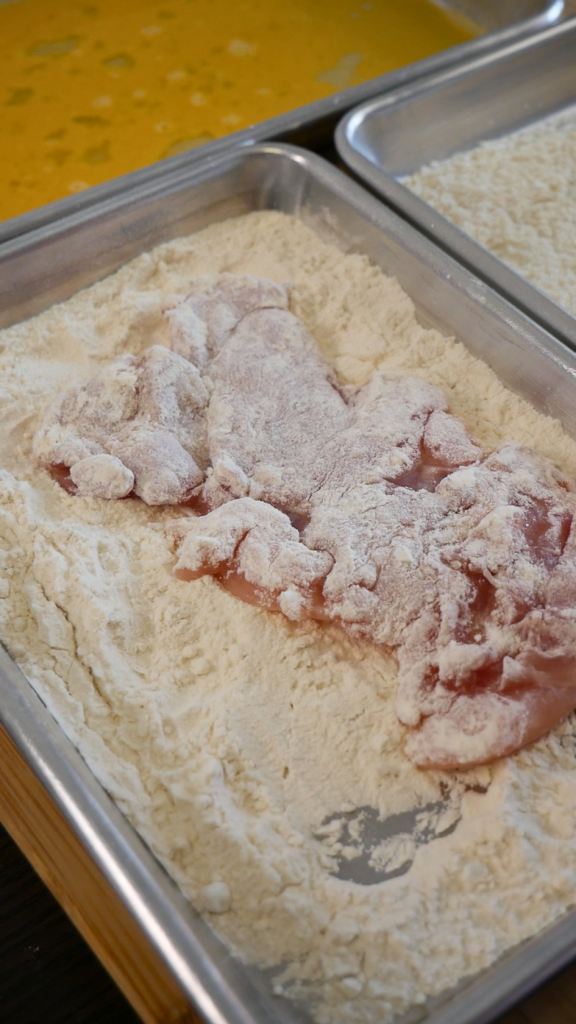
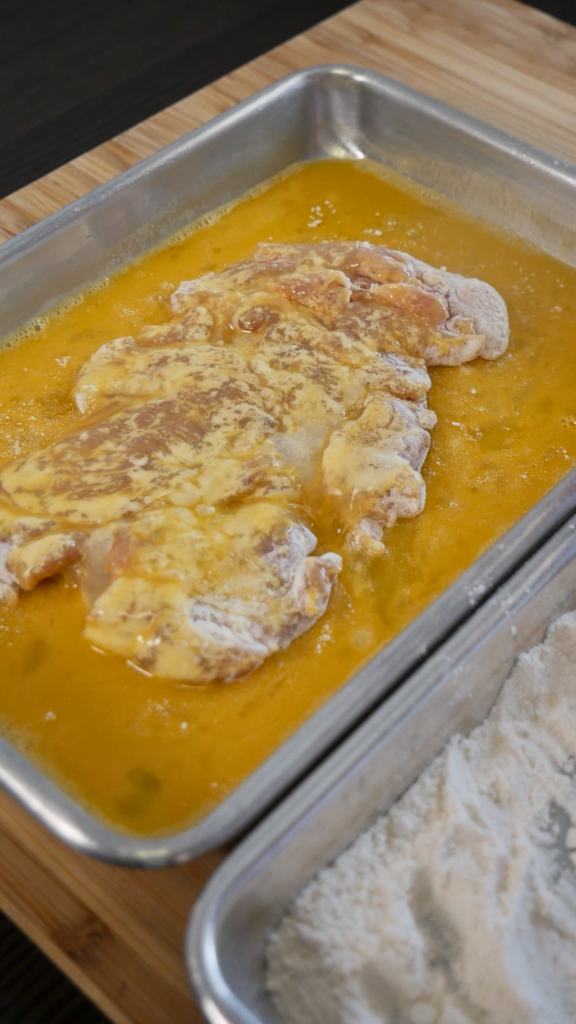
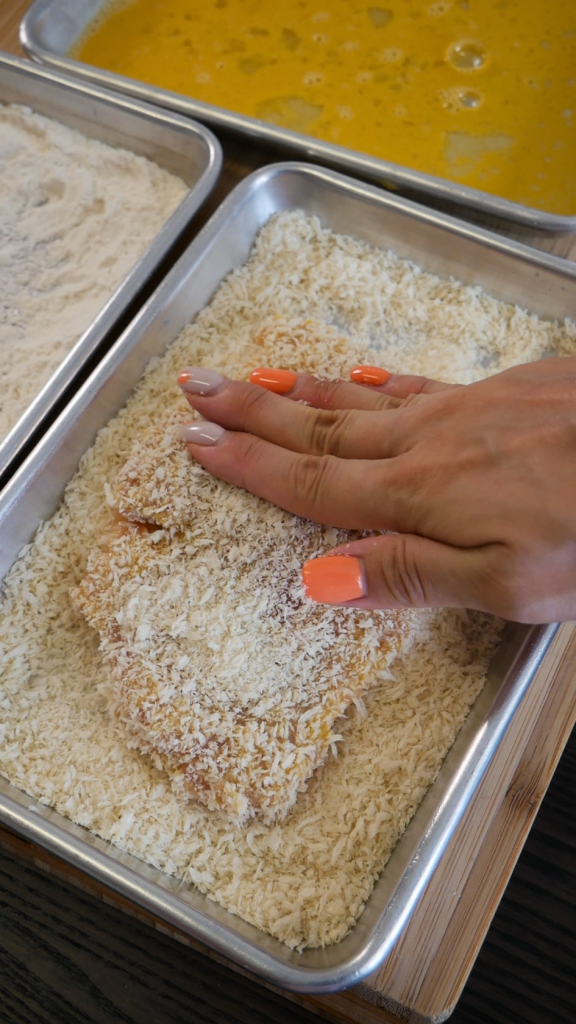
Place the chicken thigh into the flour, making sure all sides are evenly coated. Shake off any excess flour. Transfer it to the egg and coat all sides evenly. Finally, transfer it to the panko breadcrumbs and make sure all sides are coated. Gently press the panko onto the chicken so it adheres better when frying.
Step 8: Fry the breaded katsu
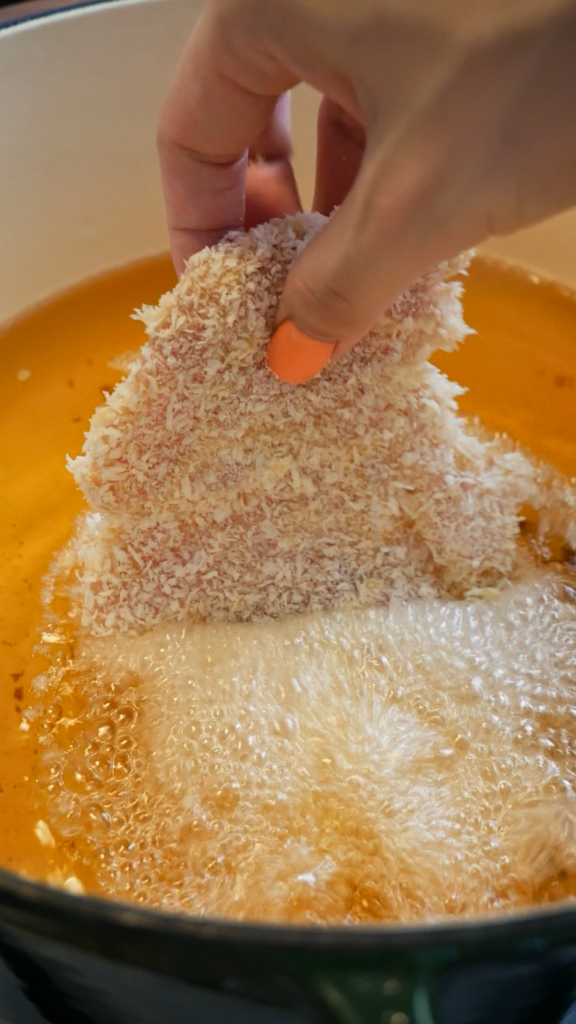
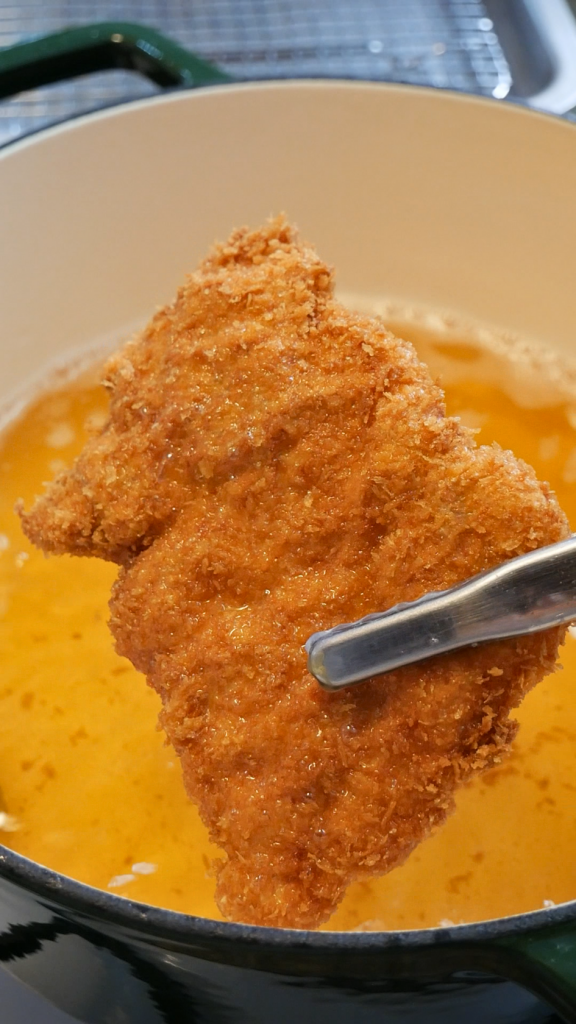
Carefully slide the breaded chicken thigh into the hot oil away from you. Fry for 1 1/2 minutes on each side until golden brown and crispy.
Step 9: Rest and cool
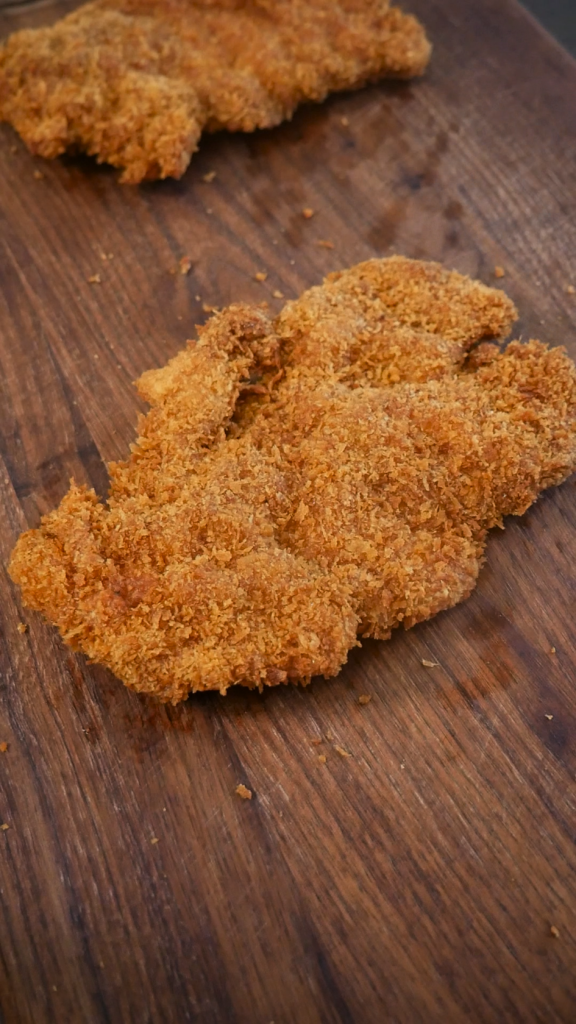
Remove and transfer the chicken katsu to a wire rack to rest and cool.
Step 10: Serve and enjoy!
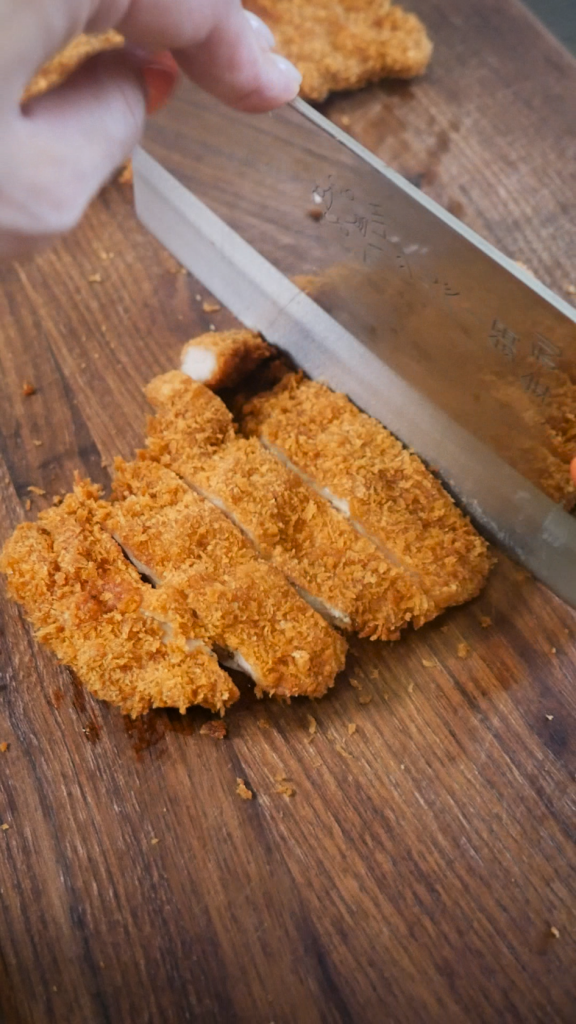


Slice into strips and serve with rice!
Preparation Tips for Easy Chicken Katsu
Here are some tips that would come in handy to make sure that you achieve the perfect chicken katsu every time:
- When buying fresh chicken thighs, look for ones that have pink flesh. They should feel firm to the touch and spring back up when lightly pressed. Avoid ones that are grayish, slimy, sticky, and have a foul odor as these indicate that they have been on the shelf for a long time.
- Pound the chicken. This not only expands its size, but it also tenderizes the meat. You can use either a meat mallet or the dull edge of your knife for pounding.
- Make sure to shake off the excess breading in each stage before proceeding to the next. This is to avoid lumpy coating.
- Always preheat the oil. It should not be lower than 350F (185C). If the oil is cold, the breading will get soggy. A kitchen thermometer will come in handy for this. If you don’t have one, you can test the oil by dipping a chopstick or the handle of a wooden spoon in the oil. If you see bubbles forming around it, the oil is ready.
- Do not overcrowd the frying pan as this would cause a drop in the oil temperature. If the oil is cold, the chicken catsup won’t crisp up.
- Give your fried chicken katsu time to rest and cool for at least 5 minutes before chopping. This allows all its natural juices to be locked in the crispy panko breading. It also lets the excess oil drain off.
- You can make a batch of this easy chicken katsu ahead in two ways. First is to freeze the breaded chicken and thaw them at least the night before frying. The second is to precook the breaded thighs, then finish the cooking when ready to serve. Anyhow, I recommend keeping them in airtight containers or Ziploc bags to maintain their freshness.
Frequently Asked Questions
What is chicken katsu sauce made of?
Tonkatsu sauce is sweet and tangy, almost like a barbecue sauce, that goes well with fried food. Its main ingredients are usually catsup, mirin, and soy sauce. You can buy it premade, like the Bulldog brand, or make it yourself at home.
What is katsu coating made of?
This easy chicken katsu is breaded in three layers: flour, egg, and breadcrumbs. Flour dries up the surface area of the chicken so that the eggs have something to stick to; the eggs then act as glue for the breadcrumbs. Some people like to double-coat their katsu with egg and breadcrumbs for a more crispy exterior! Try it and let me know how it goes.
What’s the difference between chicken katsu and fried chicken?
Chicken katsu is breaded with panko breadcrumbs. It is usually boneless and skinless. On the other hand, fried chicken is usually breaded with flavored flour or wet batter. It can be bone-in or boneless. It is usually served with gravy or katsup.
What is the difference between chicken katsu and tonkatsu?
Both are fried pieces of meat. “Ton” actually translates to “pork” in English. Tonkatsu is made of pork, usually the pork shoulder or pork butt.
Looking for more easy and delicious chicken recipes?
- Hot Honey Chicken Bites — Imagine bite-sized juicy chicken thighs with a crushed tortilla crust, sauced up with homemade hot honey. It’s got the right amount of heat and sweet, and a quick disclaimer – it’s super addicting!
- Honey Butter Fried Chicken — Double-fried chicken is smothered in a rich and indulgent honey butter sauce that’s sweet, savory, and finger-licking good! Crushed peanuts add even more crisp. It’s not spicy, so it’s perfect for kids.
- Taiwanese Popcorn Chicken — Taiwanese fried chicken or ‘yan su ji’ is a popular street food originating from Taiwan. It’s known for its distinct flavor made by combining five spice powder, Sichuan peppercorn, basil leaves, and other unique ingredients.
- Pepsi Chicken Wings — The perfect game-day finger food! Sweet, savory, and sticky, these Pepsi-glazed chicken wings come together using only 5 ingredients.
- Fried Chicken Bao — Fluffy steamed bao buns are filled with crispy Taiwanese-inspired fried chicken and dressed with a rich and flavorful Thai basil aioli for an explosion of flavors and texture in every bite!
Easy Chicken Katsu Recipe
Ingredients
- 2 chicken thighs boneless & skinless
- 1/2 cup all-purpose flour
- 2 eggs
- 1 cup panko breadcrumbs
- 1 tsp salt divided
- neutral oil for frying
Instructions
- Place the chicken thighs in between two pieces of plastic wrap. Using a meat mallet or the back of your knife, pound the chicken thighs to 1/4 – 1/2 inch thick. Season both sides of the chicken thighs with 1/2 teaspoon of salt.
- In a heavy-duty pot, heat neutral oil to 365F (185C).
- While the oil is heating up, prepare the dredge and breading station.
- In a shallow plate, combine all-purpose flour and 1/4 teaspoon salt. Whisk to mix well.
- In a separate shallow plate, crack 2 eggs. Whisk until homogenized.
- In another shallow plate, combine panko breadcrumbs and 1/4 teaspoon salt.
- Place the chicken thigh into the flour, making sure all sides are evenly coated. Shake off any excess flour. Transfer it to the egg and coat all sides evenly. Finally, transfer it to the panko breadcrumbs and make sure all sides are coated. Gently press the panko onto the chicken so it adheres better when frying.
- Carefully place the breaded chicken thigh into the hot oil away from you. Fry for 1 1/2 minutes on each side until golden brown and crispy.
- Remove and transfer the chicken katsu to a wire rack to rest and cool.
- Slice into strips and serve with rice!