These soft and fluffy bao buns are the perfect vessel for your favorite fillings! I like to make a big batch of these ahead of time because they store really well in the freezer. To reheat, I steam them for 10 minutes, and they’re ready.
These bao buns are the perfect blank canvas for your meal, so feel free to get creative with the fillings! If you need some inspiration, check out my bao recipes below:
Why you’ll love this recipe
Pillowy soft and light, you’ll have a hard time resisting these tasty bao buns. Aside from the active dry yeast, you can probably already find the rest of the ingredients in your pantry, so you can make a big batch any time you like.
Waiting for the dough to rise will likely test your patience, but I promise the results will be worth it! I like to add salt and sugar to the dough mixture so the bao buns have a bit of flavor, so I won’t blame you if you can’t resist taking a bite on their own. But the bao buns will taste ten times better when you pack them with fillings, and they’re great for sharing with your favorite people!
How do I prepare Steamed Bao Buns?
With a bit of care and effort, you can easily enjoy delicious bao buns at home. To start, follow the recipe below:
Step 1: Prepare the yeast mixture
Combine yeast, sugar, and milk in a bowl and whisk to mix well. Then, set aside for 5 to 10 minutes to activate the yeast.
Step 2: Prepare the dry ingredients
In a large bowl, combine flour, baking powder, and salt. Whisk together until combined.
Step 3: Combine dry ingredients and yeast mixture
Once the yeast has bloomed, pour the yeast mixture into the bowl with the flour. Using your hands or a spoon, mix until a rough ball of dough forms.
Step 4: Knead the dough
Lightly dust the cutting board or work surface with flour. Knead the dough for about 3 minutes. Cover the dough with a damp kitchen towel or saran wrap and let it rest for 10-12 minutes.
Step 5: Knead the dough twice
After resting, knead the dough for 1 to 2 minutes and form into a ball. Transfer the dough into a lightly oiled bowl and cover with a kitchen towel or saran wrap. Set aside and let the dough rise for at least 1 hour at room temperature.
Step 6: Prepare parchment paper
While the dough rests, prepare 10 (3×3) pieces of parchment paper for steaming.
Step 7: Cut and weigh the dough
Once the dough rises and doubles in size, punch the air out and cut it into 10 pieces. Each piece should weigh approximately 45-50 grams. Then, cover the rolled dough with a damp kitchen towel or saran wrap to prevent it from drying out.
Step 8: Shape the dough
Lightly flour the cutting board or work surface and form the dough into a round ball. Using the palm of your hands, press down to flatten the dough. Roll the dough into a long oval shape, approximately 4 inches by 2 1/2 inches and 1/4 inch thick.
(If I lost you there, watch the video below to see how I do it. 😊)
Step 9: Oil the dough
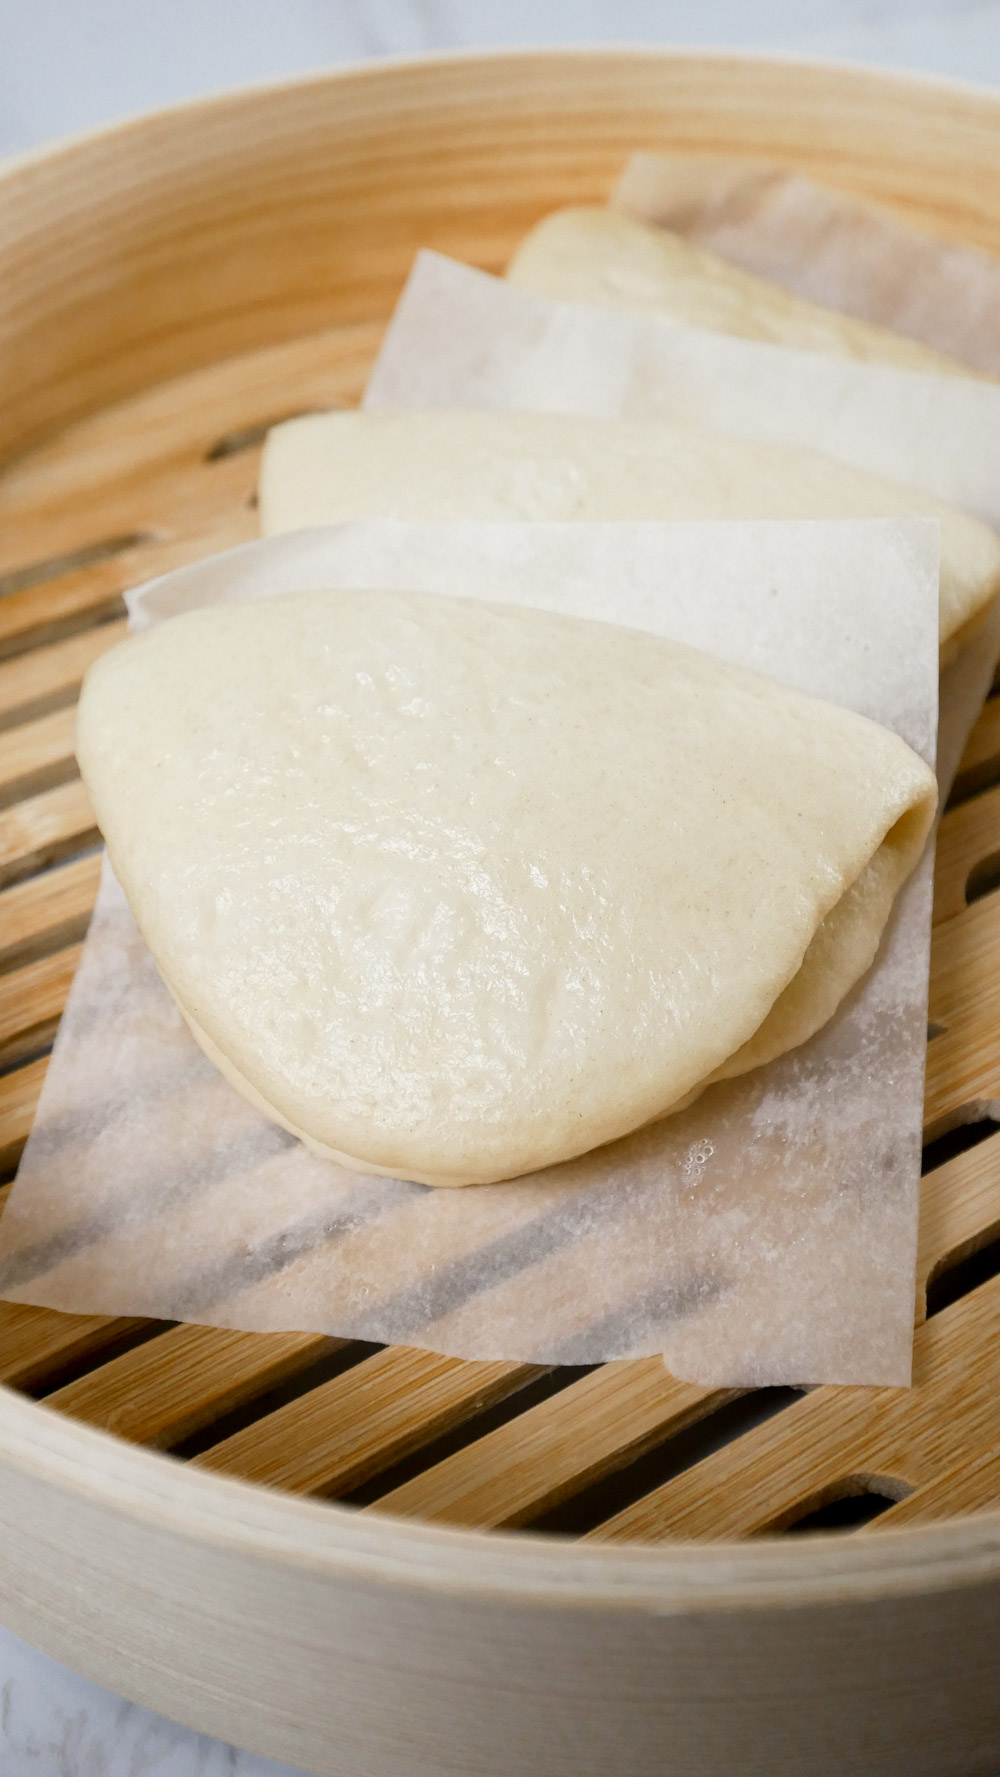
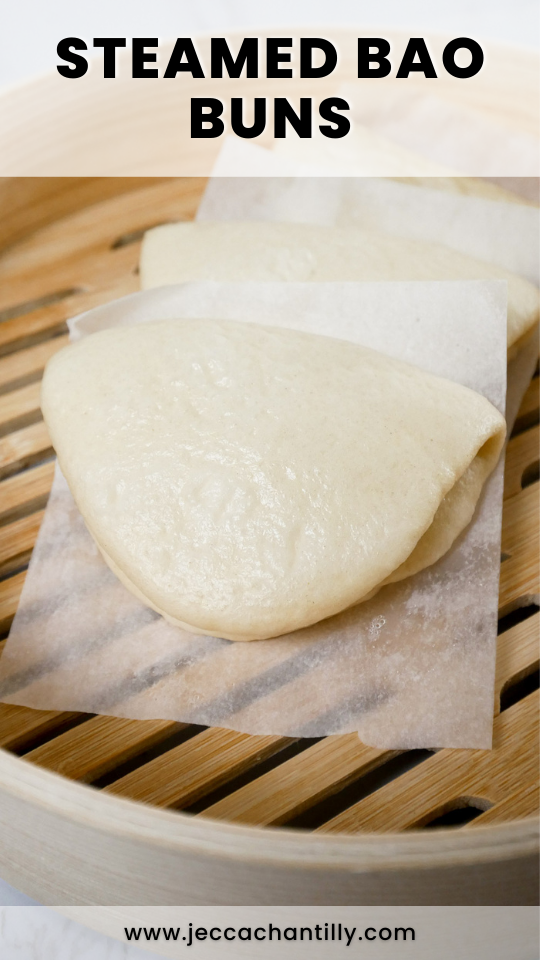
Gently brush oil on one side of the dough. Then fold the dough in half length-wise. Place the dough on top of a parchment paper. Repeat for the remaining dough.
Step 10: Let the dough rise
After shaping the dough, transfer them onto a sheet tray and cover them with saran wrap or a kitchen towel. Then, allow them to rise for 15-20 minutes.
Step 11: Steam the dough
Once the dough rises, assemble them onto a steam basket. To assemble, set the steam basket over a pan with boiling water, cover, and steam for 10 minutes. After 10 minutes, turn the heat off and let it sit for 5 minutes, keeping the lid on.
Step 12: Serve
Serve the bao buns with your favorite fillings, and enjoy!
Cooking Tips for Steamed Bao Buns
Here are a few tips you can keep in mind to help you master the process of making these tasty bao buns:
- Don’t forget to stick parchment paper on the bottom of the bao buns so they don’t stick to the steam basket when cooking.
- Remember not to over-knead the dough so it doesn’t have a leather-like texture once you eat it. You’ll know it’s done when it springs back immediately when you lightly press your finger on its surface.
- Take care not to overproof or over-rise the dough because it can collapse and lose shape. Once it doubles in size, proceed to the next step.
- Adding vinegar to the steam water will help lighten the color of the bao buns. Some even mix lime juice with the dough because its acid helps whiten its hue.
Ingredients & Substitutions
All-purpose flour: all-purpose flour is the base of the bao buns. In a pinch, you can substitute it with 70 grams of bread flour and 60 grams of cake flour for every cup of all-purpose flour in the recipe.
Baking powder: baking powder helps speed up the rising process of the dough. But you can leave it out since yeast should be sufficient for leavening the bao buns.
Salt: salt adds flavor to the bao buns so they don’t taste bland.
Active dry yeast: active dry yeast will make the dough rise so they’re light and fluffy.
Sugar: sugar provides a sweet flavor to the bao buns and helps the yeast bloom. I recommend you use white sugar for this recipe so it won’t discolor the bao buns.
Whole milk: whole milk helps make the texture of the bao buns softer. But you can also substitute it with other types of milk, including 2%, almond, or oat milk.
Neutral oil: any neutral-tasting oil should work well for the bao buns, such as vegetable, canola, or sunflower oil.
Frequently Asked Questions
How do you know when the yeast has bloomed?
You’ll know when the yeast has bloomed when you see bubbles or foam on top of your mixture – which can take about 5 minutes. Adding sugar and milk to the yeast helps ‘feed’ them to speed up the process. If you don’t see any foam forming on the top of your mixture after 10 minutes, the yeast is likely dead.
If this is the case, check the expiration date of your yeast. If it’s still good, make a fresh yeast mixture, otherwise, you’ll need to buy new yeast.
Why do you have to let the dough rest twice?
Letting the bao bun dough rest after kneading is an essential step because the first rest allows the yeast to feed on the ingredients to allow the dough to rise. Since you’ll knead and shape the dough after that step, the second rest allows it to rise again, so the bao buns are soft and light. This also helps the bao buns develop a subtle chewy texture once you bite them.
Why do you brush oil on the dough?
Brushing oil before folding the dough in half makes the bao buns easier to open later. Instead of tearing them apart, they’ll create a neat opening so you can load them up with your chosen fillings.
How long can you store bao buns in the freezer?
You can keep these bao buns in the freezer for up to 3 months. To store, place them in a plastic bag or airtight container and label them with the date of when you made them so you can keep track. You’ll know they’ve gone bad once they have an off-smell and color.
Looking for more easy and delicious bread recipes?
1. Kimchi Grilled Cheese Sandwich – this recipe is the best of both worlds. It combines the classic grilled cheese staple with spicy kimchi for an explosion of flavors you’ll want to keep on your lunch rotation.
2. Miso Banana Bread – if you’re looking to elevate your regular banana bread, you have to try this recipe. Miso jazzes up the flavors of regular banana bread, making it the perfect balance of sweetness, saltiness, and umami.
3. Gilgeori Toast (Korean Street Toast) – you no longer have to travel to Korea to get a bite out of this popular street food when you make your version at home. You can use any vegetable combination to create the best sweet and savory combo!
4. Mushroom Steak Burger – if you’re craving a delicious meatless option, you won’t want to miss out on this burger recipe. The Portobello mushrooms are slathered with a savory and smokey glaze that’s simply irresistible!
5. Hong Kong French Toast – indulge your sweet tooth with this elevated French toast recipe. This dish is a popular treat you’ll usually find in cafes and restaurants in Hong Kong that you can now recreate at home!
Steamed Bao Buns
Ingredients
- 2 cups (300g) all-purpose flour plus more for dusting
- 1 tsp (4g) baking powder
- 1/4 tsp (1.5g) salt
- 1 tsp (3.5g) active dry yeast
- 4 tsp (20g) sugar
- 3/4 cup (180ml) whole milk warmed to 100-115 F
- 2 tbsp neutral oil
Instructions
- Combine yeast, sugar and milk in a bowl and whisk to mix well. Set aside for 5 to 10 minutes to activate the yeast.
- In a large bowl, combine flour, baking powder and salt. Whisk together until combined.
- Once the yeast has bloomed, pour the yeast mixture into the bowl with the flour. Using your hands or a spoon, mix until a rough ball of dough forms.
- Lightly dust cutting board or work surface with flour. Knead the dough for about 3 minutes. Cover the dough with a damp kitchen towel or saran wrap and let it to rest for 10-12 minutes.
- Knead the dough for 1 to 2 minutes and form into a ball. Transfer the dough into a lightly oiled bowl and cover with a kitchen towel or saran wrap. Set aside and let the dough rise for at least 1 hour in room temperature.
- While the dough is resting, prepare 10 (3×3) pieces of parchment paper for steaming.
- After the dough has risen and doubled in size, punch the air out and cut into 10 pieces. Each piece should weigh approximately 45-50 grams. Cover with a damp kitchen towel or saran wrap to prevent them from drying out.
- Lightly flour cutting board or work surface and form the dough into a round ball. Using the palm of your hands, press down to flatten the dough. Roll the dough out into a long oval shape, approximately 4 inches by 2 1/2 inches and 1/4 inch thick.
- Gently brush oil on one side of the dough. Then fold the dough in half length-wise. Place the dough on top of a parchment paper. Repeat for the remaining dough
- Transfer the dough onto a sheet tray and cover with saran wrap or kitchen towel. Allow the dough to rise for 15-20 minutes.
- Once the dough has risen, assemble onto a steam basket. Set the steam basket over a pan with boiling water, cover, and steam for 10 minutes. After 10 minutes, turn the heat off and let it sit for 5 minutes making sure to keep the lid on.
- Serve while hot and enjoy!
Notes
- These baos can be made in advanced and stored in the freezer. Steam the baos then allow them to cool down completely. Once cool, individually wrap each bao with plastic wrap then transfer to the freezer.
- To reheat the baos from the freezer, steam for 5 minutes.
Pin & save this recipe for later!
so easy to follow and the video really helps
Hi Kristine, So happy (and proud) you made these from scratch!!
hi! i was wondering how to cook these if i dont have a steamer ?
Hi Amna! Here are a few ways you can make this without a steamer:
1. Place a round wire rack (something like this) on the bottom of a wide deep pan or wok. Fill the pot with hot water until it reaches right below the wire rack. Arrange the steamed baos on a heat-proof plate then cover and steam!
2. If you don’t have a round wire rack, place two chopsticks on the bottom of the pot by making an X so they cross over each other. Fill the pot with hot water until the chopsticks are submerged. Then place a heat-proof plate with the steamed baos on top. The chopsticks should hold the plate up. Cover and steam!
I hope this helps! 🙂 If you have any other questions, please send them my way <3
Hello!
I’m making the baos tonight for dinner tomorrow. Should I freeze them after steaming them or can I place them in the refrigerator? Thank you!
Hi Thomas! You can freeze the baos after steaming! 🙂
First time making and they turned out perfectly! Thanks so much for the wonderful recipe!
Hi Taniesha! I’m so happy to hear that you enjoyed this recipe 🙂