Tuna onigiri is the easiest, simplest, and quickest filling to make a super delicious onigiri! I remember eating onigiri’s every morning when I was in Japan and would always make sure I had a tuna one.
These are great for a quick lunch at home or on the go! I love making these when I go on picnics or hiking. They’re so easy to make and can be made ahead of time too! If you’re making them in advance, just wrap the onigiri in plastic wrap and place it in the refrigerator. The plastic wrap will keep the moisture in and prevent the rice from drying out.
I assembled the onigiri with a little help from my favorite kitchen gadget – this Kirby onigiri mold! The mold made the process so much easier and the onigiri comes out perfect every single time. I highly recommend getting yourself a mold because it’s a big-time saver!
Tuna onigiri is simple to make and only requires a few ingredients. But first, let’s dive into what onigiri is.
What is Onigiri?
Onigiri, also known as omusubi or rice balls, is a Japanese dish consisting of steamed white rice shaped into triangular or oval forms before being wrapped in nori (seaweed).
Tuna mayo, salted salmon, pickled umeboshi, katsuobushi, kombu, tarako, and other savory ingredients are commonly used to fill onigiri. These rice balls are ideal for taking on picnics since they’re easy to transport and tasty.
While onigiri is traditionally made with white short-grain rice, brown rice or sushi rice can also be used. Recently, onigiri has become popular internationally, and there are now many different types of onigiri available, including vegan and gluten-free options.
Whether you enjoy it as a light meal or a tasty snack, onigiri is a delicious way to experience Japanese cuisine.
A Look At The History of Onigiri
Onigiri is one of the first travel-friendly foods in Japan. It is thought to have originated during the 11th century when a Japanese novelist known as Murasaki Shikibu wrote about people eating rice balls wrapped in bamboo sheaths while on long journeys.
During the war, soldiers were said to have carried onigiri with them as quick lunchtime meals. Onigiri was also eaten during the Edo period as a type of fast food but during this time, onigiri was just a rice ball with a bit of salt.
Nowadays, onigiri has become a popular dish in Japan and can be found in convenience stores, supermarkets, and even some restaurants. It is now made with different fillings and flavors to suit everyone’s taste.
What Makes Onigiri So Delicious?
While this snack is quite simple, onigiri is exceptionally delicious. The rice is usually seasoned with salt, and the fillings add a burst of flavor. These are just some of the reasons why onigiri is so delicious:
Enhances the Flavor of the Rice
Onigiri is typically made with short-grain white rice or sushi rice. This type of rice is sticky and has a slightly sweet flavor. When the rice is mixed with salt, it enhances the sweetness of the rice and makes it even more delicious.
Additionally, the rice is sometimes mixed with a little bit of vinegar. This gives the rice a slightly tangy flavor that pairs well with the fillings.
The Fillings Add More Flavor
As I mentioned, onigiri is usually stuffed with savory fillings that add a ton of flavor!
The pickled umeboshi is sour and slightly sweet, while the katsuobushi is smoky and savory. The kombu adds an umami flavor, and the tarako is creamy and salty.
The combination of these flavors is what makes onigiri so delicious. You can get a mix of sweet, sour, salty, smoky, and umami in one bite.
Perfect For Any Occasion
Onigiri is perfect for any occasion because it makes a great quick snack or light meal. You can take it with you on the go or enjoy it at home.
It is also a popular dish to eat during festivals and other special occasions. In Japan, onigiri is often given as a gift during the New Year.
Different Shapes of Onigiri
Onigiri can be made into many different shapes. The most common shape is triangular, but onigiri can also be round, oval, or rectangular.
The shape of the onigiri is usually determined by the filling used. For example, triangular onigiri is often filled with salmon, tuna, or katsuobushi. Round onigiri is often filled with pickled umeboshi, and oval onigiri is often filled with kombu.
You can make onigiri into any shape that you like. The important thing is to have fun and be creative!
Tuna Onigiri Ingredients & Substitutions
If you are planning on making tuna onigiri at home, here are some ingredients that you will need:
Short-grain rice: this is the most critical ingredient. You will need short-grain white rice or medium-grain rice. I do not recommend using long-grain rice because it’s not as sticky and starchy.
Salt: salt is used to season the rice
Canned tuna: since this recipe only requires a handful of ingredients, I recommend using the highest-quality tuna you can find. The tuna is the star of the filling so it will make all the difference. I like using the Dongwon brand.
Scallions: the scallions add freshness to the filling. You can also substitute this with chopped onions.
Kewpie mayo: while you can use any type of mayo you prefer, I highly recommend Japanese Kewpie mayo. It is richer, creamier, and slightly sweeter than your typical mayo brand.
Sansho pepper: this is a Japanese pepper that has citrus undertones. The spice is subtle and on the milder end. I like using the S&B brand.
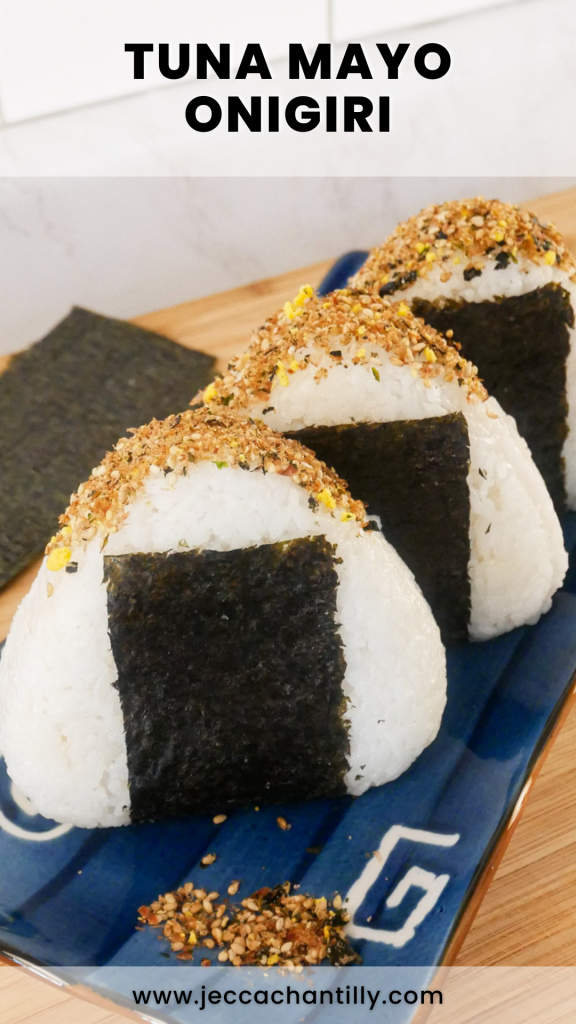
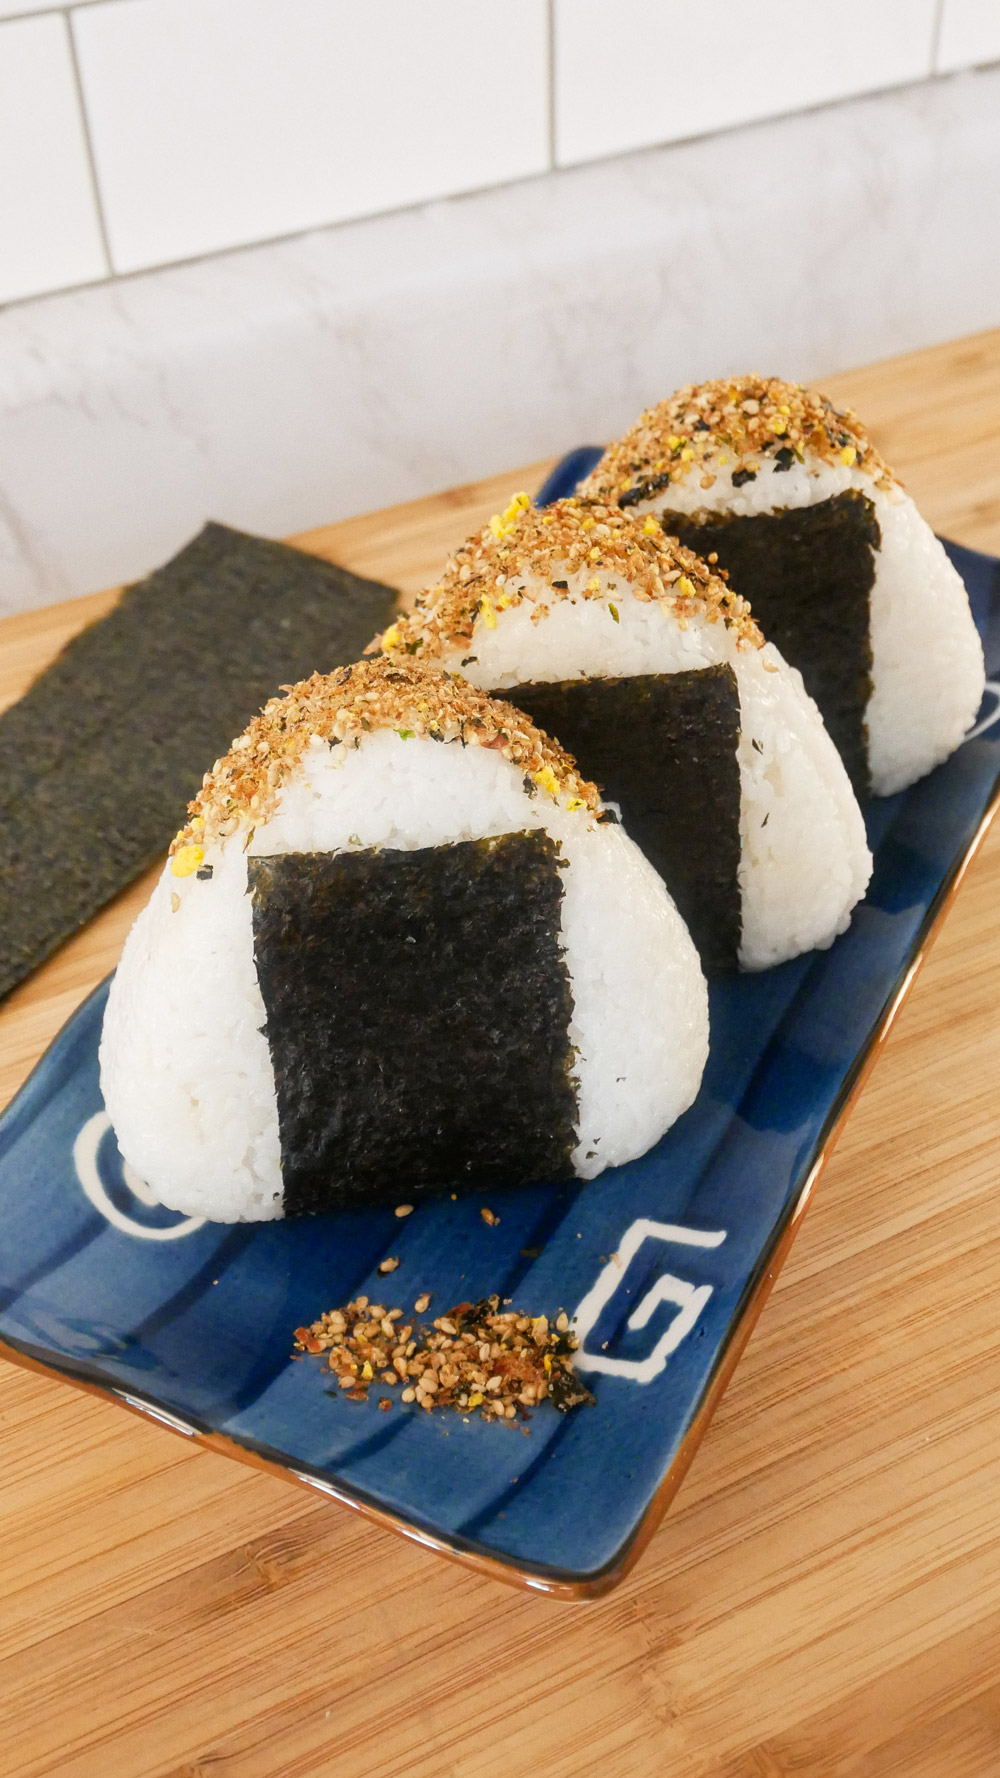
Furikake: furikake is used as a garnish for the onigiri. Not only is it great for aesthetic but it adds an extra layer of umami flavors to the onigiri. My go-to furikake is MISHIMA Bonito & Egg but you can use any type of furikake for this.
Nori: to complete the onigiri, you’ll need a few sheets of roasted seaweed.
How to prepare Tuna Onigiri
Step 1: Prepare rice
In a bowl, combine cooked short-grain rice and salt. Mix together well and set aside to cool down.
Step 2: Make tuna filling
In another bowl, mix tuna, scallions, mayo, and sansho pepper. Mix until well combined.
Step 3: Assemble the onigiri
Next, assemble the onigiri. If using a mold, follow the instructions on the package.
If you’re shaping by hand, start by wetting your hands with water first so the rice doesn’t stick. Grab about 1/4 cup of rice and flatten it out on your palms. Place 1-2 tbsp of the tuna filling in the center. Top with some more rice and press it down so the rice on top sticks to the rice on the bottom. Using your palms, apply pressure on all sides and shape the onigiri into a triangle. This may take some practice and a few tries.
Step 4: Wrap with nori & serve
When you’re happy with the shape, wrap a sheet of nori on the underside of the onigiri. Dip or sprinkle the furikake on top and enjoy!
Preparation Tips For Making the Perfect Tuna Onigiri
If you’re new to making onigiri, here are a few helpful tips:
Tip #1: Always use fresh rice
It’s important to use fresh rice when making onigiri. Rice a day or two old will not stick together either, and it will be more challenging to work with.
If you can, cook the rice just before you make the onigiri. This will ensure that the onigiri turns out correctly.
Tip #2: Use your hands or a mold to shape the onigiri
Onigiri is traditionally shaped by hand however it does take practice! With practice and time, it’s actually pretty easy to do.
To shape the onigiri by hand, first, wet your hands with some water. Then, take a small amount of rice and shape it into a ball. Once you have a rice ball, use your hands to mold it into the desired shape.
Remember to add pressure to the rice so that it sticks together. If the onigiri is too dry, you can wet your hands with water and add more moisture to the rice.
Tip #3: Use a mold shape the onigiri
If you’re pressed with time or you just don’t have the patience to make it by hand, you can use an onigiri mold which will make the process easier and more convenient! Personally, this is my preferred way of making a foolproof perfect onigiri every time.
I assembled the onigiri with my favorite kitchen gadget – this Kirby onigiri mold! The mold made the process so much easier and the onigiri comes out perfect every single time. I highly recommend getting yourself a mold because it’s a big time saver!
Tip #4: Do not overfill the onigiri, or it won’t be easy to eat or assemble
Fillings should be added sparingly and should not make up more than ⅓ of the onigiri. If you add too much filling, the onigiri will be difficult to eat and fall apart.
It’s important to have a good rice-to-filling ratio otherwise, it may be too bland or too salty.
Tip #5: Onigiri can be made ahead of time
If you’re making onigiri in advance, just wrap the onigiri in plastic wrap (without the nori) and place it in the refrigerator. The plastic wrap will keep the moisture in and prevent the rice from drying out.
When you’re ready to eat it, wrap it with a fresh piece of nori and enjoy!
Frequently Asked Questions
Here are some of the most frequently asked questions:
How long will the tuna onigiri stay fresh?
Tuna onigiri is best eaten immediately after it is made. However, it will stay fresh for up to 24 hours if stored in the fridge.
How should I store tuna onigiri?
Onigiri can be wrapped in saran wrap and stored in the fridge, if not eaten immediately.
Can traditional mayonnaise be used in place of Japanese mayonnaise?
Yes, you can use traditional mayonnaise in place of Japanese mayonnaise. However, the flavor will be slightly different. I highly recommend using Japanese Kewpie mayonnaise if you can find it! It’s richer and a little sweeter than regular mayonnaise.
What kind of tuna should I use?
I recommend using canned tuna for this recipe. You can use any brand you like however, I prefer the Korean brand – Dong Wan.
What other fillings can I use?
If you don’t like tuna, feel free to use another type of protein in its place. Chicken, salmon, and tofu are all excellent options. You can also add vegetables to the onigiri for a more well-rounded meal.
Where can I buy onigiri?
There are many places where you can get onigiri. In Japan, onigiri is available at convenience stores, supermarkets, and restaurants. If you’re not in Japan, don’t worry! Many Japanese restaurants offer onigiri. You can also find onigiri at your local Asian markets.
Looking for more easy and delicious onigiri filling ideas?
Check out my other onigiri recipes!
Tuna Onigiri
Ingredients
- 3-4 cups cooked short grain rice
- 1/2 tsp salt
- 1 can of tuna drained
- 2 scallions finely chopped
- 2 tbsp mayo preferably Kewpie mayo
- dash of Japanese sansho pepper or ground black pepper
- furikake for garnish
- nori sheets
Instructions
- In a bowl, combine cooked short grain rice and salt. Mix together well and set aside to cool down.
- In another bowl, mix tuna, scallions, mayo, and sansho pepper. Mix until well combined.
- Next, assemble the onigiri. If using a mold, follow the instructions on the package.
- If you're shaping by hand, start by wetting your hands with water first so the rice doesn't stick. Grab about 1/4 cup rice and flatten it out on your palms. Place 1-2 tbsp of the tuna filling in the center. Top with some more rice and press it down so the rice on top sticks to the rice on the bottom. Using your palms, apply pressure on all sides and shape the onigiri into a triangle. This may take some practice and a few tries.
- When you're happy with the shape, wrap a sheet of nori on the underside of the onigiri. Dip or sprinkle the furikake on top and enjoy!
- *Onigiri's can be made in advance and can be eaten cold too! To serve the next day, wrap the onigiri in plastic wrap and place in the refrigerator. The plastic wrap will keep the moisture in and prevent the rice from drying out*
Pin & save this recipe for later!